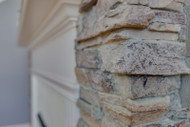
Faux wall panels are an innovative design alternative to real building materials. Their list of advantages goes on from their cost effectiveness to their ease of installation. Installing faux wall panels around corners can seem a little tricky. With Barron Designs products like endcaps and interlocking corners, it has never been easier. Allowing your projects to reach new levels and touch boundaries that real masonry can not.
By installing the panels yourself, using basic tools and adhesive, you have the power to save more money and complete the job in just a few hours. All of our faux wall panel varieties are made from high-quality, durable polyurethane. Meaning they are extremely resistant to cracking, fading, and chips. Each of our faux products is hand-crafted by artisans here in the U.S. making them look indistinguishable from the real thing.
Before starting on your installation, we suggest checking out our panel installation guide and videos including all safety information.
What are my options for installing faux panels around corners?
There are four ways to approach installing faux wall panels around corners. Mitering the corner, using interlocking outside corners, using flush corners, and using end caps. Understanding each option is important, as every project is different. Depending on the location of your install, you will need to determine what is best for you. Every option offers you a new reality of what your end project can look like. Faux products allow you to escape the mundane of everyday building materials, and create something that truly inspires you.
Mitering a corner takes more time and skill, while using a style-specific end cap has limitations but offers a near-perfect finish. Below we dive into each solution and why they might be for you.

Mitering the Corner:
Mitering corners is the more time-consuming way to install faux wall panels around inside and outside corners or even to create a clean edge. However, with a little skill and patience, mitering can yield a beautiful result. To miter a corner correctly you will need a table saw. Before starting we always suggest familiarizing yourself with the panel and the appropriate panel installation guide.
This does take some attention to detail and time, yet your results are stunning. See our full detailed instructions for mitering an inside corner, mitering an outside corner and mitering a clean edge. When mounting ensure you pay close attention to the corner seam. Use a fine hand file to blend edges and paint from the touch-up kit to conceal the seam.

If you are looking for a more simple solution to installing faux panels around a corner Barron Designs offers products like interlocking outside corners, universal flush corners, and end caps to make your project more attainable.
Interlocking Outside Corners:

Using a style-specific Interlocking Outside Corner is a sure way to flawlessly transition your project around a difficult corner. Made from the same durable polyurethane foam as our faux wall panels, every piece of corner molding is highly resistant to fading, cracking, pests, weather, and deterioration. Below we will dive into the simple steps it takes to install your interlocking corner.
Step 1: Orient Panels & Determine Installation Order

First, we suggest laying all your panels out on the floor and ensuring they are oriented correctly before installing them. You will want to orient the panel so that the flat lip is facing upwards. You will then determine the finger side and slot side of the interlocking corner, this will vary by each style.
Step 2: Dry Fit

Dry fit the row of panels leading into the finger side of the interlocking corner to determine how to trim the first panel in that run. Dry fitting your run allows you to correctly measure the amount you will need to cut off your first panel. This step is important to ensure that, when installed and all of the fingers are seated in the slots, there are not any gaps. Completing this step is critical before you start working with the adhesive.
Step 3: Measure and Trim Panel
After you feel confident about how you are installing your panels and have determined the amount you might need to remove from your first panel, it is time to trim. Depending on your project or panel style, you may need to trim the bottom of your panels. Use our panel installation guide to assist you with this process.
To trim a panel properly we recommend you turn the panel over on a soft surface and make a mark when you plan to make the cut. Using a wood-cutting saw with a finish blade, trim the panel.
Step 4: Install Panels
Now that your faux wall panels are prepped and ready to go, it is time to install! You will install the row of panels leading into the finger side of the interlocking corner using the construction adhesive and screws as described in the panel installation guide. Our products are attainable options compared to real masonry, making them very easy to install. Following our guide and using the proper tools, will have your installation done in no time.
Step 5: Install The Interlocking Corner and Panels

Install the interlocking corner using construction adhesive and screws as described in the panel installation guide. Then you will install the row of panels leading away from the corner using the same steps. Your interlocking corner and panels will fit together in unison. Creating the classic aged look of real brick and stone.
Universal Flush Inside and Outside Corners:

Universal Flush Corners connect with your faux wall panels to create a butt joint. This will require trimming to the finger side or slot side of the panel so that the panel sits flush against the universal corner. This method imitates a stunning frame-like appearance that is commonly used in fireplace scenes as shown in the image above.
Universal flush corners meet up with your faux wall panels to create a butt joint. This will require trimming the finger side or slot side of the panel so that the panel sits flush against the universal corner.
Design a stunning rustic border for your panels with a Dry Stack Universal Flush Corner. Like the panels, the corners’ high-density polyurethane material won’t split, peel or fade, as they are impervious to temperature change, humidity, and pest invasions.

Universal Flush corners are installed using construction adhesive and screws as described in the panel installation guide.
- You will install the Universal Flush corner as the first piece in the panel run (see images above).
- Then install the rest of your faux wall panels as directed in our panel installation guide.

Universal Flush Corners is a creative style choice when using faux stone products. They imitate the natural look of stacked rock while ensuring your project has a clean neat look. A look that is extremely difficult to obtain using real stone.
Interlocking Endcaps:
Interlocking Endcaps are Barron Design's newest innovation to install faux wall panels around corners with ease. Faux wall panel end caps provide an easy alternative to mitering a clean edge to your design. They provide a flawless finish to your faux wall panels while adding to the illusion of traditional masonry. This natural end is made from the same durable polyurethane foam as our panels, every interlocking endcap is highly resistant to fade, cracking, pests, weather, and deterioration.
Interlocking Endcaps are installed similarly to our interlocking outside corners. They are installed using construction adhesive and screws, following the full panel installation guide.

Slot side interlocking endcaps will be installed as the first piece in a run of faux wall panels.

Finger side interlocking endcaps will be installed as the last piece in a run of faux wall panels.

Faux Wall Panel with Endcap
Using faux endcaps is like the bow on top of the present. You will have a flawless finish while saving more time from mitering, and money for installation. This installation method paves the way for the rest of the interlocking faux wall panels of your choice to align in unison, making the difference between a faux panel wall scene and a real masonry wall scene indistinguishable.
Feel confident installing around corners!

Explore creative freedom with faux products from Barron Designs. An attainable, realistic solution to raw building materials. Installing your faux wall panels doesn’t have to be scary. With products like our endcaps, interlocking outside corners, and universal flush corners, you can be confident in conquering a corner.
Shop Related Products


