Electrical Outlet Surround Installation Instructions
General Tools and Materials:
-
 Caulk Gun
-
 Screw Gun /
Drill Driver
& Bits
Screw Gun /
Drill Driver
& Bits
-
 Jig Saw with
Finish Blade
Jig Saw with
Finish Blade
-
 Caulk /
Chalk / Paint
Caulk /
Chalk / Paint
-
 Electrical Box
Extender
Electrical Box
Extender
-
 Course Grit
Sandpaper
Course Grit
Sandpaper
-
 Loctite® PL®
Premium®
3X Construction
Adhesive
Loctite® PL®
Premium®
3X Construction
Adhesive
-
 Pencil
-
 Tape
Measure
Tape
Measure
-
 Touchup Kit
-
 Small
Paint Brush
Small
Paint Brush
-
 Small
Screwdriver
Small
Screwdriver
-
 Electrical
Outlet
Surround
Electrical
Outlet
Surround
-
 Safety
Glasses
Safety
Glasses
WARNINGS:
- Be sure to obey all safety rules and recommendations set forth by tool manufacturers.
- Wear safety glasses during the entire installation process.
- Always comply with clearances set forth by the manufacturer of stoves, fireplaces, furnaces, and any other heat source.
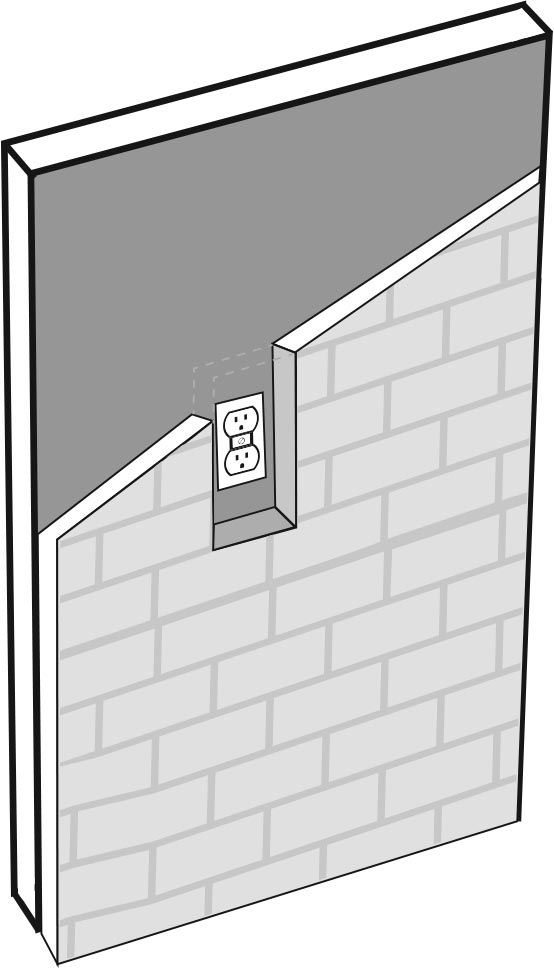
Slim Electrical Outlet Surround:
Outlet is recessed from the panel and sits flush against the drywall.
Outlet is recessed from the panel and sits flush against the drywall.
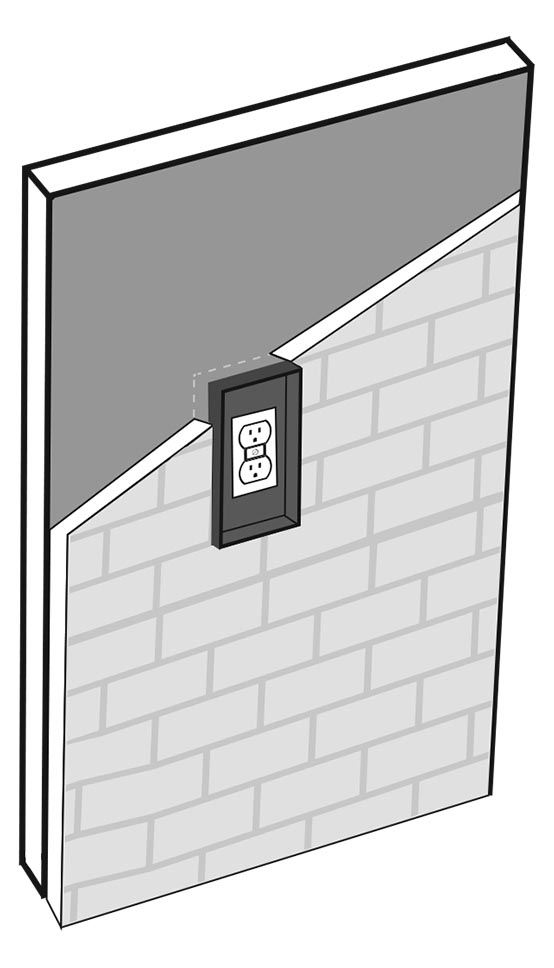
Standard Electrical Surround:
Outlet extender is used to bring the outlet closer to the face of the panel.
Outlet extender is used to bring the outlet closer to the face of the panel.
WARNING! Consult a licensed electrician if your installation requires electrical work that you are unfamiliar with.
Click Here for Care and Maintenance info.
Electrical Outlet Surround Installation
Step 1
Plan the Installation
- Remove all outlet plates.
- Install the panels leading up to the outlet according to the appropriate panel installation guide.
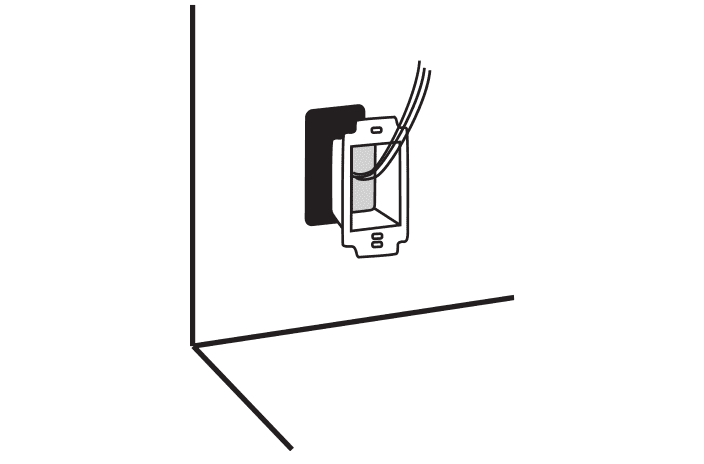
Step 2
Install Electrical Box Extender
Tools:
- Electrical Box Extender (Needed for standard Electrical outlet surround only)
WARNING! Consult a licensed electrician if your installation requires electrical work that you are unfamiliar with.
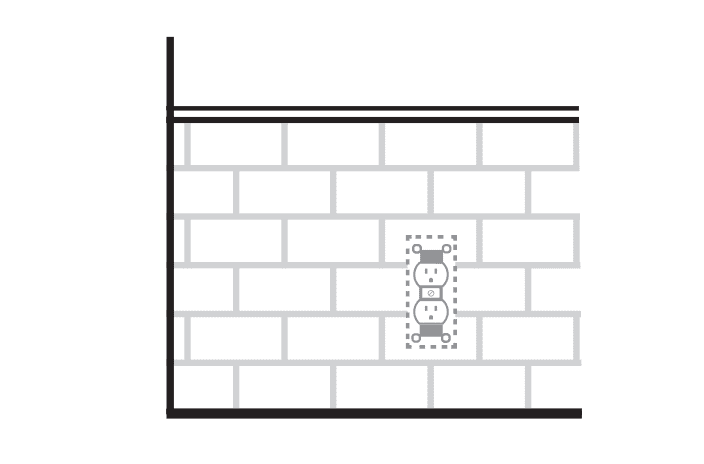
Step 3
Mark Location
Tools:
- Caulk / Chalk / Paint
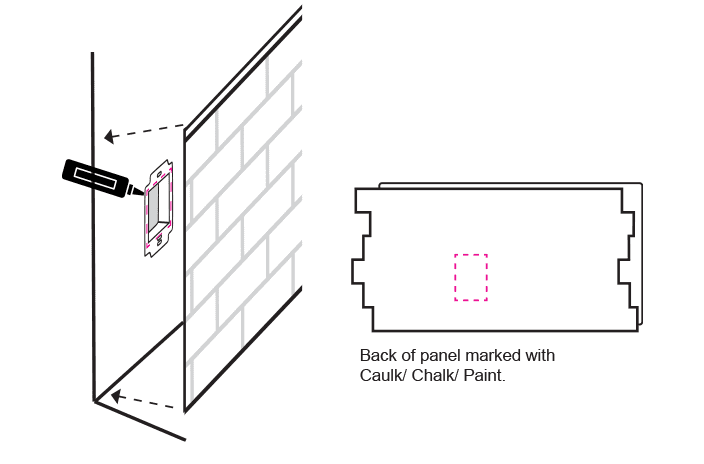
- Outline the perimeter of the box with a material that will transfer a mark to the back of the panel. Chalk, paint or caulk all work well.
- Press the panel against the wall and mark the back of the panel.

Step 4
Outline Cut
Tools:
- Pencil
- Tape Measure
- Outlet Surround
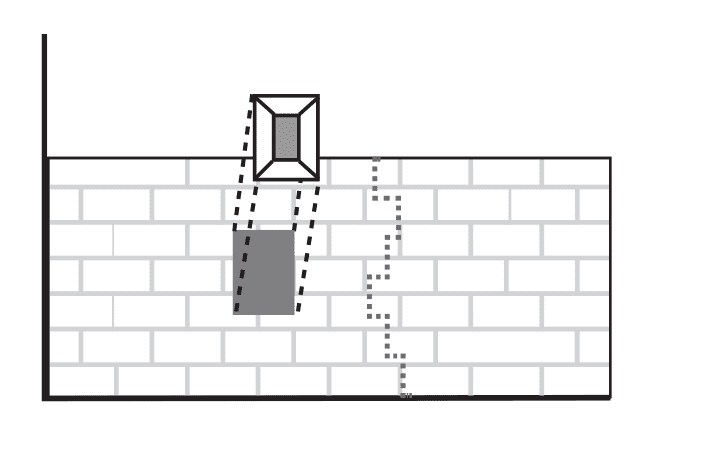
- Place the panel face down on a soft surface.
- Place the outlet surround on the panel, centered on the mark from Step 2 and use a pencil to outline the surround.

Step 5
Cut Panel
Tools:
- Screw Gun / Drill Driver & Bits
- Jig Saw with Finish Blade
- Drill pilot holes in the corners.
- Use a jig saw to cut along the outline of the outlet surround.
Pro Tip: Cut about 1/8” inside the lines to allow for a snug fit.
Step 6
Dry Fit
Tools:
- Course Grit Sandpaper
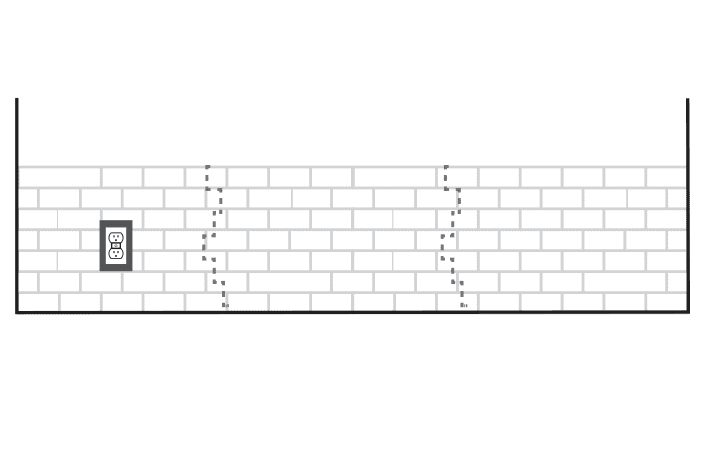
- Hold the panel up to the wall and ensure that the hole is centered on the outlet.
- If needed, use a coarse grit sandpaper to adjust the hole so that it can accommodate the surround and is centered on the existing outlet.
- Dry fit the surround into the panel and make any necessary adjustments for a snug fit.

Step 7
Finish the Drywall (Slim outlet only)
Tools:
- Touchup Kit
- Small Paint Brush
- The opening of the slim outlet surround is intended to be a bit larger than the plate that covers the electrical outlet.
- Use the wash from touch up kit to finish about a 1” perimeter around the outlet box.
Step 8
Install Panels
Install the rest of the panels based on the appropriate panel installation guide.
Step 9
Install the Surround
Tools:
- Caulk Gun
- Loctite® PL® Premium® 3X Construction Adhesive
- Once the wash used in Step 7 has dried, screw the outlet plate back on the outlet
- Install the surround by adding small amount of adhesive to the back of the surround and inserting in the opening.
- Install the surround by adding a small amount of adhesive to the back of the surround and inserting in the opening.
- Screw the outlet plate onto the outlet.