When you love your house — but not its exterior — there are a number of things you can do to make it more appealing. Stone column wraps are extremely versatile and can be used in many different ways: You can add entrance columns to your driveway, add some flair to your front porch or create a new mailbox column.
You might be surprised to learn just how simple it is to do these projects without having to hire a contractor. If you have a free weekend or two, are good with tools and can follow directions, you can take on an exterior stone column wrap project yourself.
To begin, you first want to determine how you want your exterior to look — and then see how faux columns from Barron Designs can help you achieve that look.
Exterior Stone Column Wrap Ideas
Barron Designs' column wraps can improve your exterior in a number of ways. Here are just a few ideas on how to upgrade the appearance of your home using faux stone column wraps.
- Add the column wrap to your mailbox. Your mail carrier, neighbors and guests will love the new look of your mailbox, and may even want to take on this DIY project for their own home! This is a simple and fun project that take only a day (or less) to complete, but it’ll make you smile every time you pull up to your home.
- Build driveway entrance columns. Do you want to enhance your privacy and make your driveway more elegant at the same time? Use exterior stone column wraps to boost your curb appeal and impress visitors.
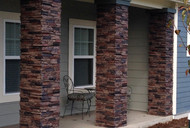
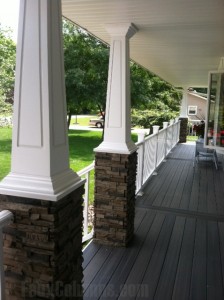
- Give your home a classic look by installing porch columns. These can make your porch look lovely and pair well with any color or style of home.
We have a number of different styles and colors of faux columns to choose from. These range from traditional and conservative to modern and chic, so you can find the right column to match your home’s style as well as your personal tastes.
Our column lines include Ashford, Wellington, Carlton and Norwich columns. With every column line, we include instructions for installation as well as project ideas. Check out what other customers have done with their exteriors to come up with more ideas for your own home!
Porch Column Covers vs. Porch Column Wraps
Stone Column Wraps Exterior Installation Tips
One of the most frequently asked questions we get about our faux columns is, “How do I install them?” Since different types of columns have different types of installation procedures, we’ve included detailed DIY faux column installation instructions for each product line on our website.
Note: Before you dive into our installation guides, make sure you order samples and check out our project ideas to see what exterior stone column wraps would work best for your home. Also, follow your owner’s manuals safety precautions at all times for any power tools, woodcutters or other tools or materials you’ll use for this project.
Stone column exterior wraps are installed on wooden posts. We recommend a 4- or 5-inch post, cemented into the ground. This takes a bit of handiwork, but isn’t beyond the skills of most DIY-oriented homeowners.
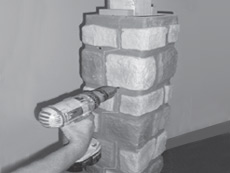
Once you install the post, follow the appropriate method to install the columns in the manner required for your selected product. Here are some of the ways their installation processes differ:
- Ashford models have stack sections inside which must be cut to size with a carpentry jigsaw. Then the columns are slotted over the installation post and filled with a few inches of concrete for a secure foundation.
- Norwich columns are referred to as “wraps.” These are polyurethane corner panels that slot together to form a column. They need to be installed on a wooden base frame, which requires slightly more work because you’ll have to frame out the foundation first.
- Carlton sleeves work in a similar way, except that you attach them directly to a 6- by 6-inch installation post. You can install them with regular wood screws and caulk. Because they slot together like jigsaw pieces, it has a seamless finished look, and it’s virtually impossible to tell it’s not made from real carefully stacked stone.
- Wellington column wraps go on an existing support post. You can install them with glue and adhesive, but you’ll need to make sure the fingers fit together well. You’ll also need a damp rag to wipe off any of the excess caulk that may have squeezed out upon installation.
By following the installation guides along with safety tips for your tools and materials, you can successfully complete your faux column DIY project in a weekend or even a few hours, depending on your level of experience.
Did you purchase faux columns from Barron Designs, or are you considering it? Then you’ll need our faux columns installation guide to get started with your DIY project. Don’t forget to follow all the steps!
Shop Related Products


