
A lot of people get intimidated by our Soft Stop System, but no need to! The installation is very simple and easy. Here is how to install the Soft Stop on your barn door hardware kit in 5 easy steps.
Before you start
RealCraft's Soft Stop is recommended for interior use only. Soft Stops can be used on flat track kits that are 5 feet and longer. If using two Soft Stops (one at each end of the track), this configuration is compatible with one-piece tracks over 12 feet in length, or with 2-piece tracks 10 feet in length and longer. The door weight limit rating is 220 lbs. Click here for illustrated Soft Stop installation instructions.
The Soft Stop should be installed on the track before mounting the track to the wall.
What is in the package
Each RealCraft Soft Stop kit comes with following items:
 Soft Stop 2. (x2) Bracket 3. (x4) M4X16 Machine Tapping Screw 4. (x4) M4 Nut 5. (x2) Trigger 6. (x6) M4X2 Self tapping screw 7. (x1) Allen Key 8. (Varies) 1/8")
1. Attaching the Soft Stop to the bracket
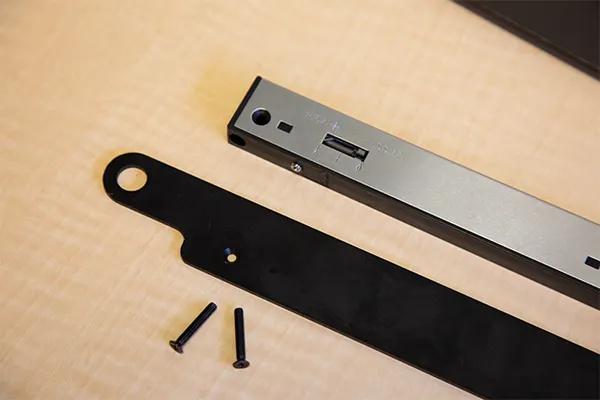
Attach the soft stop to the bracket using the M4X16 machine tapping screws, one on each side.

Make sure the Soft Stop side that has the “+MORE and -LESS” and the small adjustment screw is close to the outside edge of the bracket, next to the circular hole.

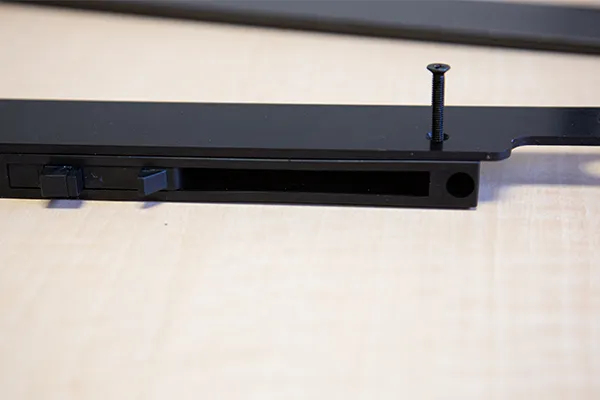
The side with the triangular-shaped leg should be close to the long oval slot on the bracket.


Flip the Soft Stop and bracket and attach the M4 nuts.
Repeat these steps for the other Soft Stop and bracket.
2. Attaching the Soft Stop and bracket to the barn door flat track.

Now attach the Soft Stop to the edges of your flat track system’s track. Make sure to align the circular hole of the bracket to the edge of the track; the long oval slot should point towards the center of the track.


Using the flat track installation hex lag bolt, attach the Soft Stop between the track and the standoff base as shown on the image.
If your flat track has more than 4 holes


 holes, you must add a 1/8")
NOTE: if you have a long track with more than 4 (four) holes, you must add a 1/8" flat washer (included) between the track and the standoff base on the holes without end stops for proper operation.
3. Attaching the flat track to the wall or ledger board


Attach the flat track to the wall or ledger board. Read this guide on how to install a barn door for detailed instructions.

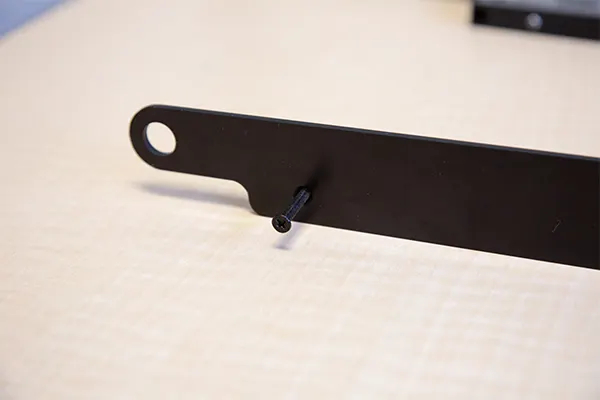
Position close up: the actuator should be close to the center of the track, not the edges.
4. Attaching the trigger to the top of the door

Mount the door to the rail and move it to the end of the track and localize the Soft Stop actuator.


Position the trigger between the tabs of the actuator and attach it to the door using two M4X25 Self Tapping Screws. Slide the door to the other side of the track and repeat the process.
NOTE: depending on the thickness of your door, you may have to mark the trigger's location with a pencil and detach the door from the track to screw the trigger.
5. Testing Soft Stop operation

After attaching the triggers, slide the door from side to side to test the Soft Stop operation. If everything is working correctly, attach the anti-jump discs at the end of the tracks.
Adjustment

Use the screw at the end of the Soft Stop to increase or decrease resistance.

Use the Allen Key to adjust the height of the trigger for a better grip on the Soft Stop.
Done! No more slamming doors!
*Soft Stop are intended for everyday use only. Do not us extreme force when closing your door. Too much force will cause the actuator tabs to break.


