
Tips to design and install Window Headers
The right accents are key in adding period detail to a modern home. One subtle touch is adding a door or window header - but how do you go about installing one of those?
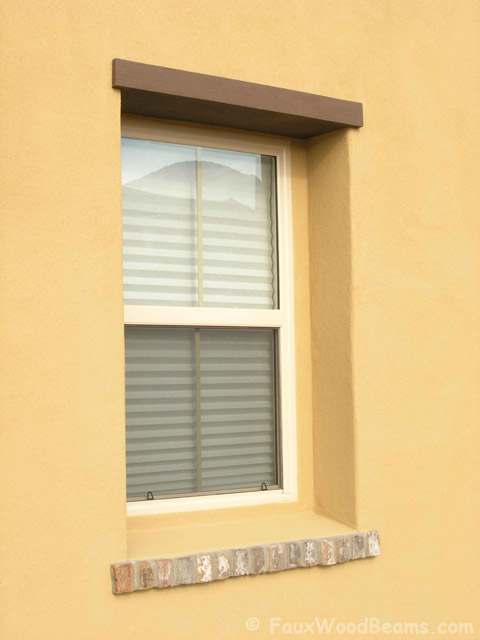 A classic window header, trimmed and installed to give the appearance of a solid wooden beam.
The trick to using our products effectively is to mirror how the real thing would be used in a house construction.
On the interior of a home, faux beams should mimic how real wood beams are used to hold up the ceiling. Likewise, rafter tails on a roof should look like the overhanging tails of real wooden roofing beams.
An additional touch that can make all the difference is the use of headers.
These additions mimic how solid timber beams used to be placed above window openings in traditional houses.
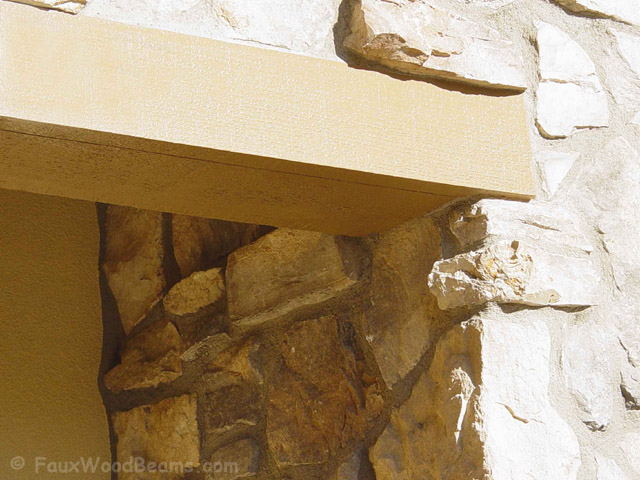 This close-up shows how the top plane is longer than the bottom, which has been trimmed to fit the space available.
In real period homes, these solid wooden beams can be seen from the exterior - and our polyurethane L-headers are designed to offer that same look in a home with more modern construction.
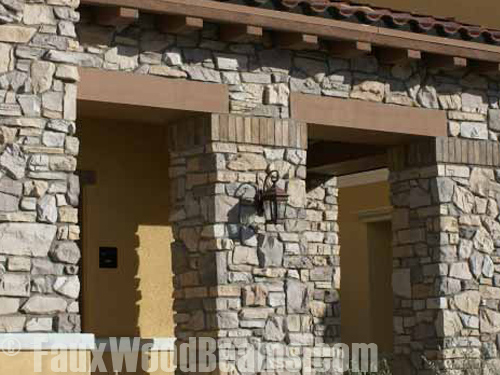 L-headers blend beautifully with this home's stone entranceway
These L-headers are just what their name suggests - a two-sided beam in an L-shape.
They slot flush against the top edge of a window, with the pattern exposed on the top of the window opening, and stretching out across the top.
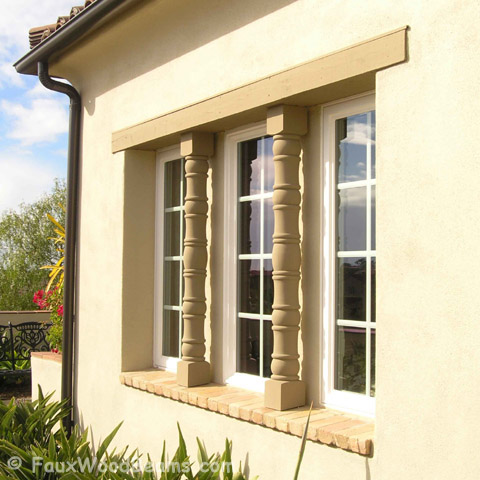 Headers add a clean finish to this home's large window with balustrades
Installing them is simple, and will take less than an hour. Incredibly lightweight, they can be installed with regular wood screws and construction adhesive, and once in place are almost impossible to tell from the real thing.
 This is a great example of a regular installation. The header was attached with screws and adhesive, and spackled around the edges.
The only detail that you need to know is how to cut the L-beams to shape, prior to installation.
Our window headersare sold with both the bottom and the top lengths equal. When you come to install them, though, this presents a challenge.
To get the look of a solid beam, the top section has to stretch wider than the window opening itself.
To actually fit inside the window frame, though, you'll need to trim the bottom section to fit.
Fortunately, these pieces are made from high density polyurethane foam, which can be cut to shape with a regular wood saw.
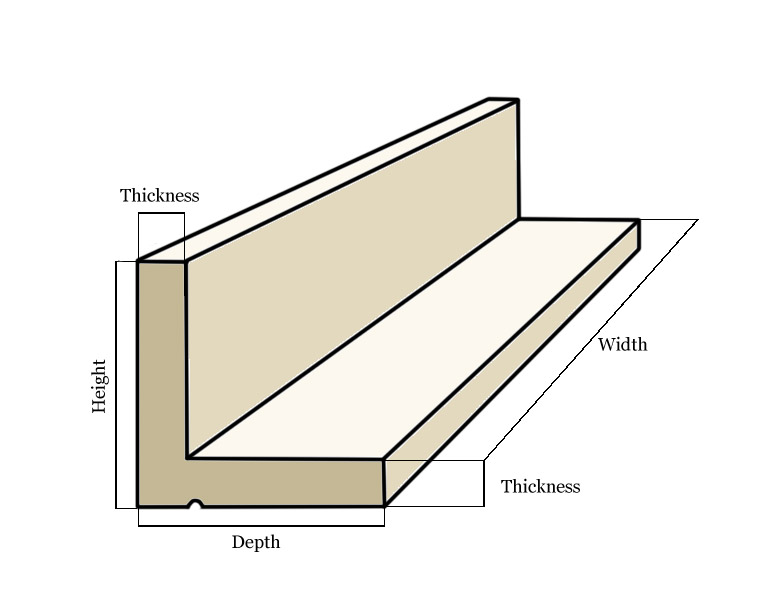 Our beams are supplied in an evenly-matched L-shape. Trim the bottom section to fit your window opening.
All you need to do is measure the size of the window opening, and then mark up the bottom plane making sure than an equal amount of the top plane overhangs it (for example, if your beam is 41" long and your window opening is 36" wide, make sure to leave an equal amount of 2.5" inches on either side.)
The good news is that once the cuts are made, they'll be seamlessly hidden by the window installation - and the results will look incredible!
Shop Related Products


