
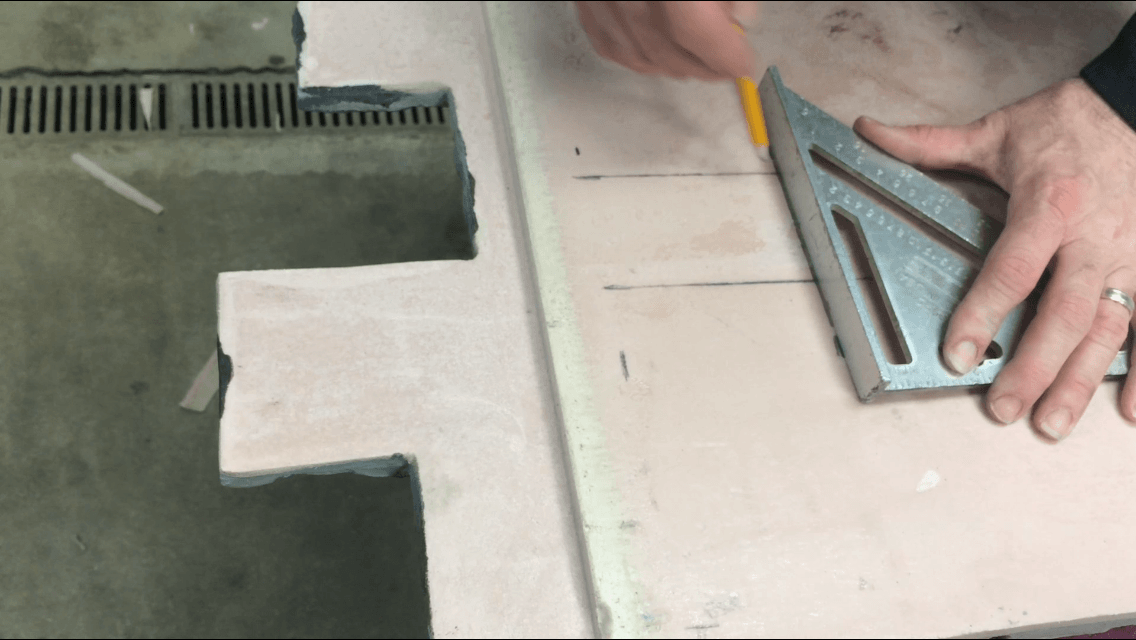
Oscillating Cutting Tool for Trimming Panels
Steve Siedlecki, a FauxPanels.com customer from Antioch, IL, recently sent us a ton of pictures from the kitchen project he was working on - and a great tip! He used an oscillating cutting tool to make short work of trimming our panels to size.
"Attached are the photos we took during our recent install of your Norwich-Birchwood panels," Steve writes, in the email that accompanied the photos. "We found the use of an “oscillating cutting tool” made custom panel modifications and outlet cut-outs a breeze! The cuts were precise and the tool went through the panels like butter."
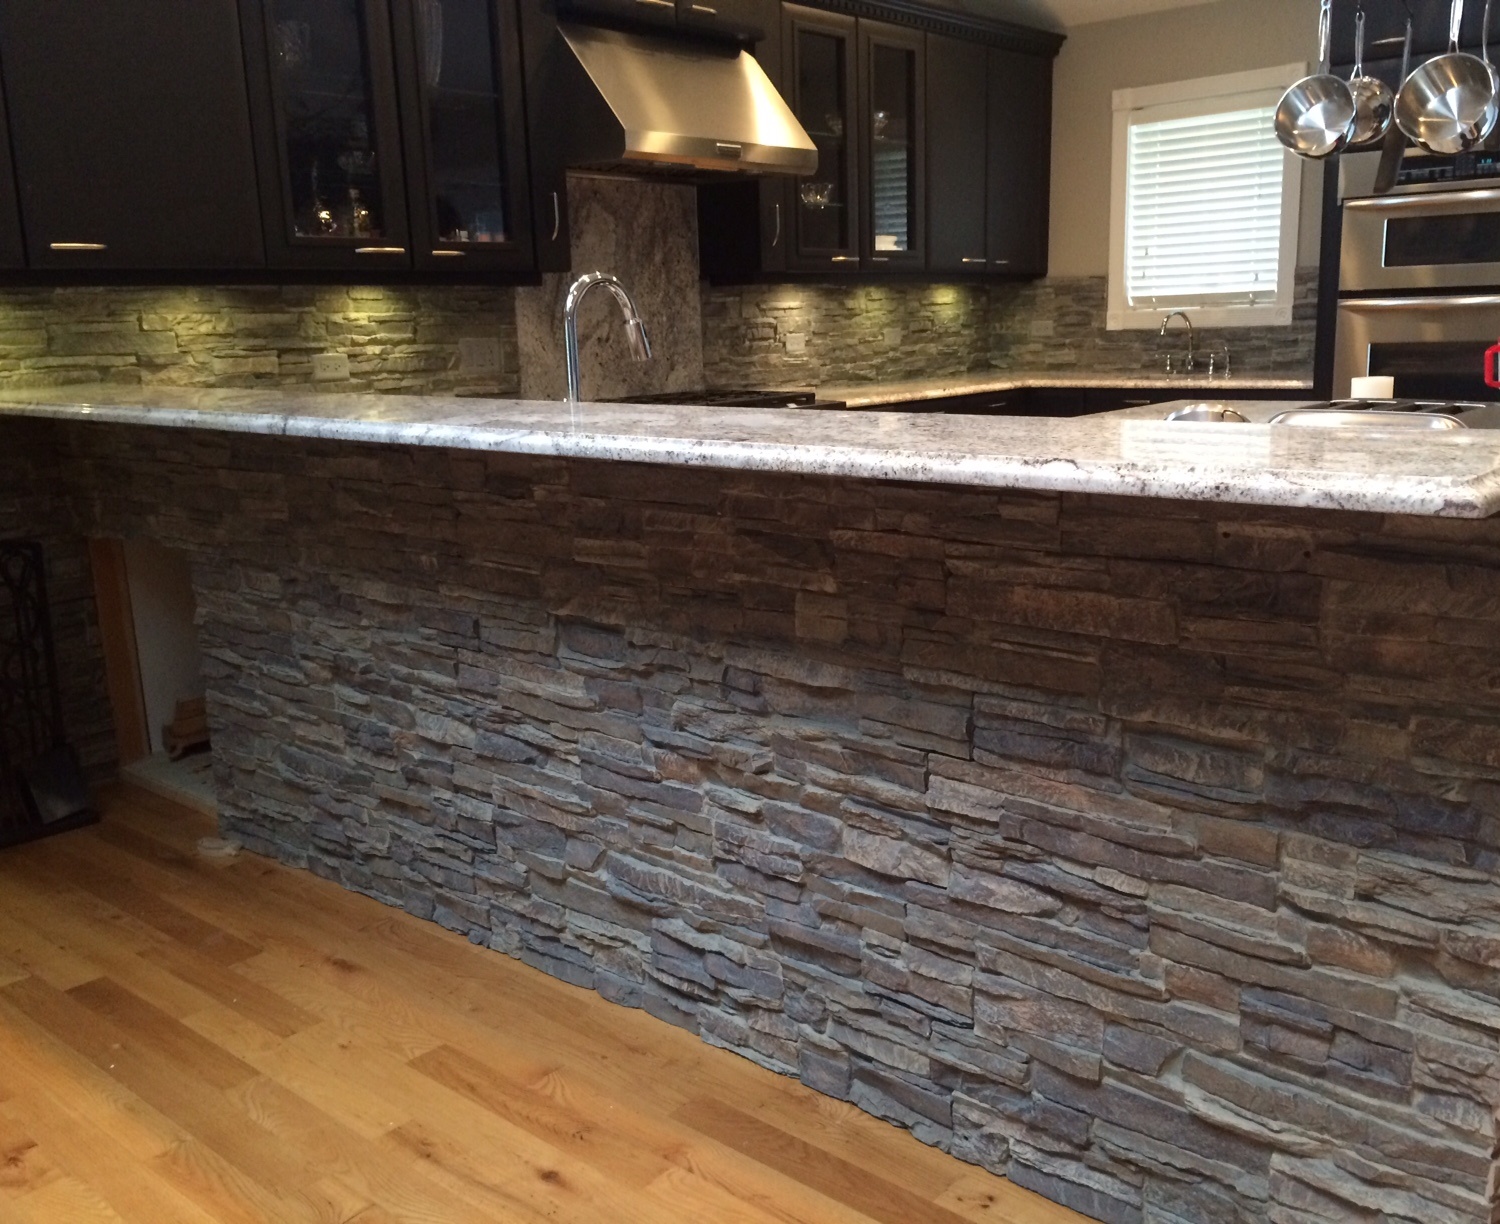 AFTER: The kitchen island looks fantastic with our panels installed.
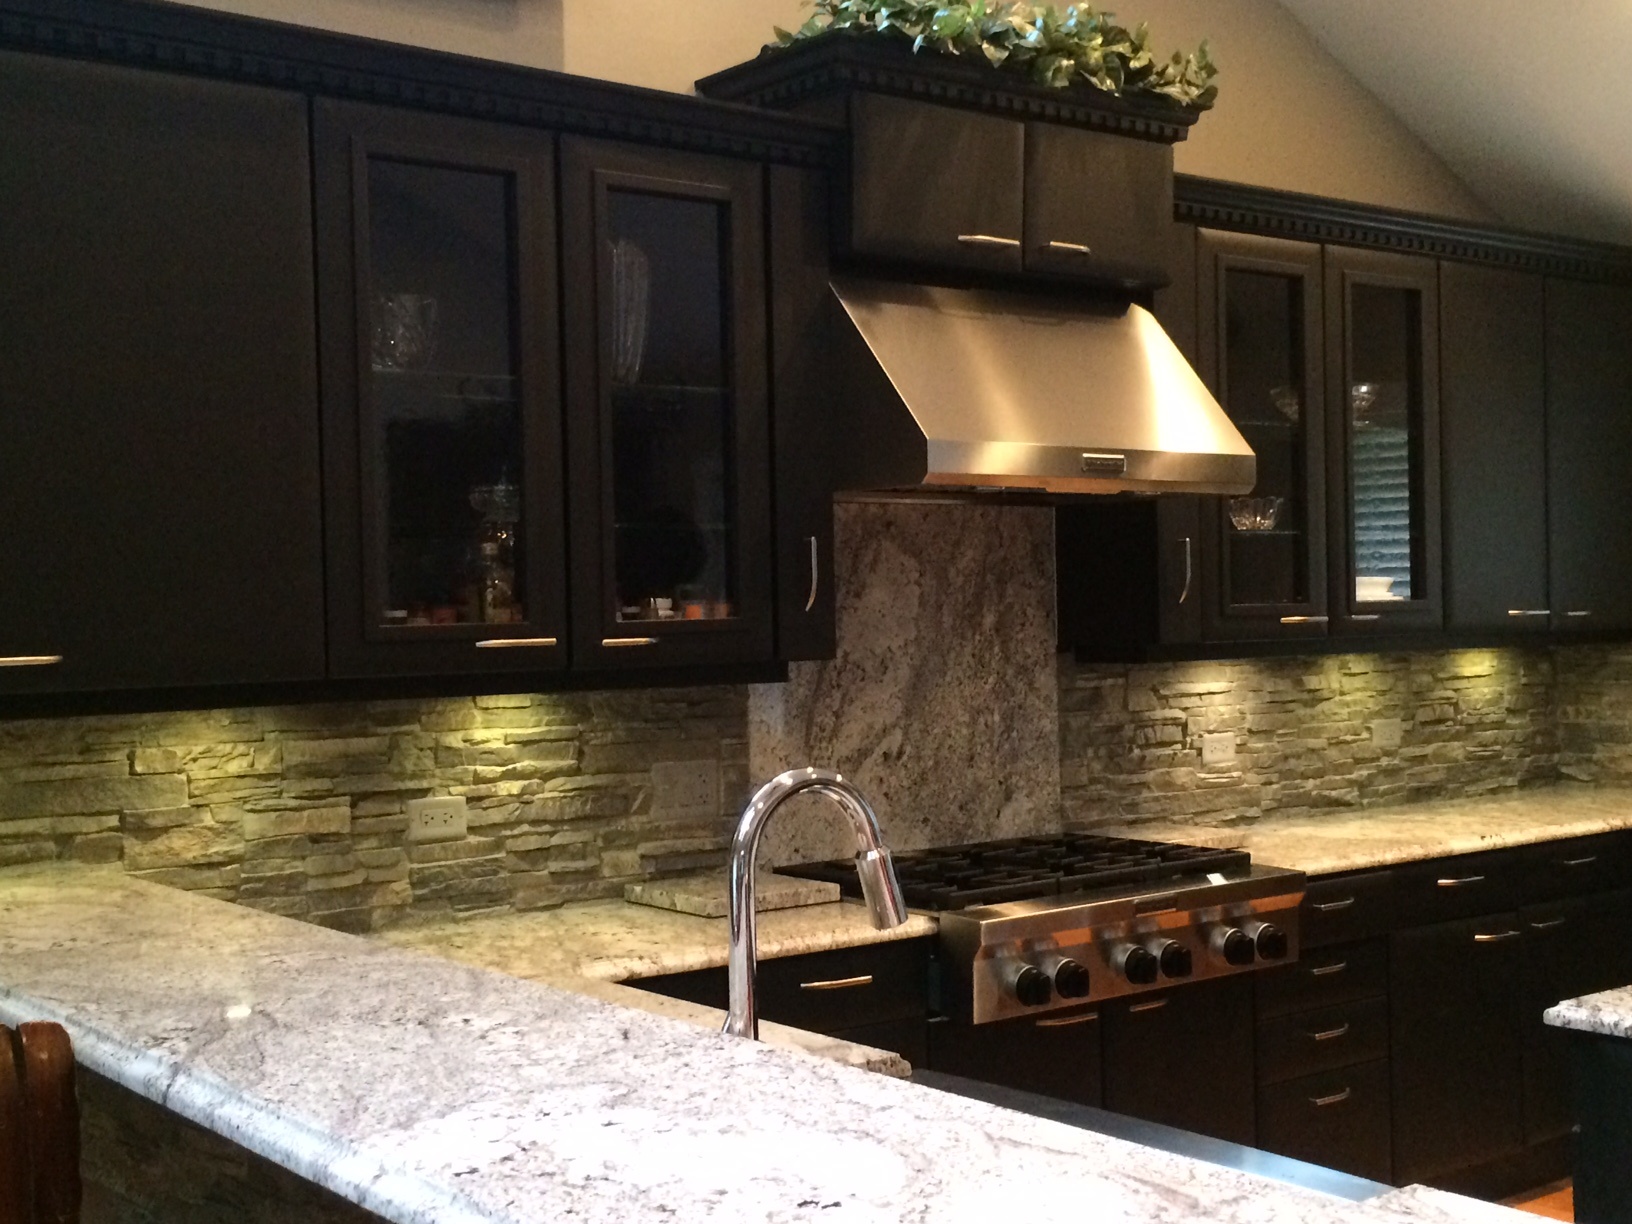 The matching backsplash required a little more cutting to size.
Because our panels are molded from lightweight and durable polyurethene foam, cutting them to size requires nothing more than a regular wood saw - but we're always excited to learn of tips and tricks to make those cuts quicker and more precise.
Steve's project involved installing panels on a kitchen counter and backsplash, and the process for that was straightforward, if not easy. The panels were measured and then cut to size, before being installed directly to the flat surface with regular construction adhesive.
 Careful measurements ensured a perfect fit.
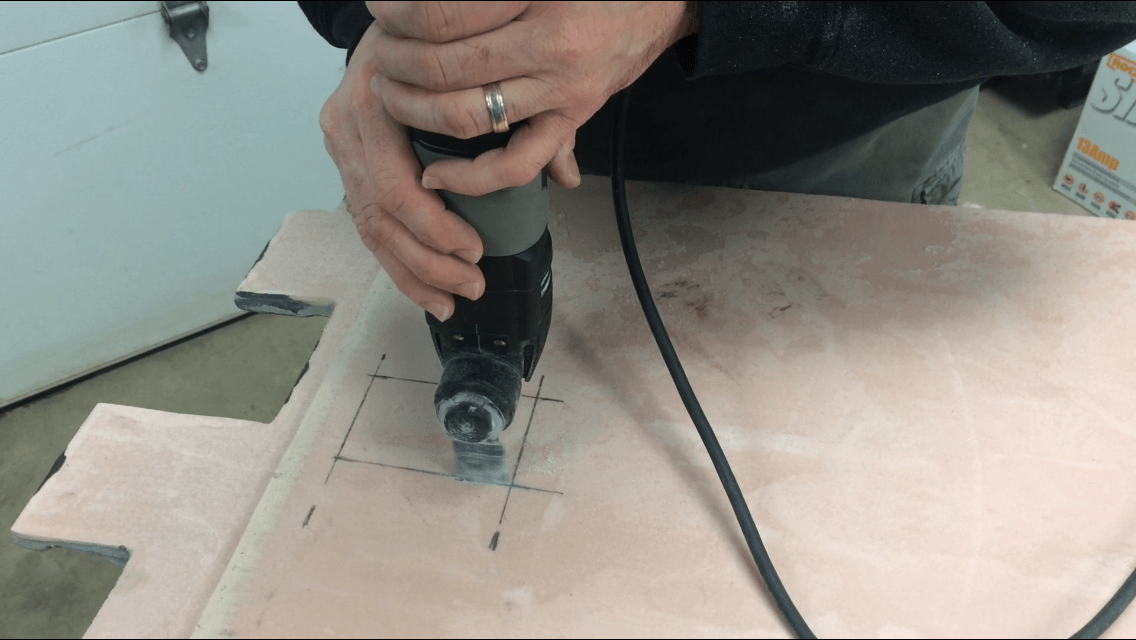 The oscillating cutting tool was perfect for carving outlet holes and cutting the panels to size.
What took skill and precision was cutting the panels to size - which is where the tool came in handy.
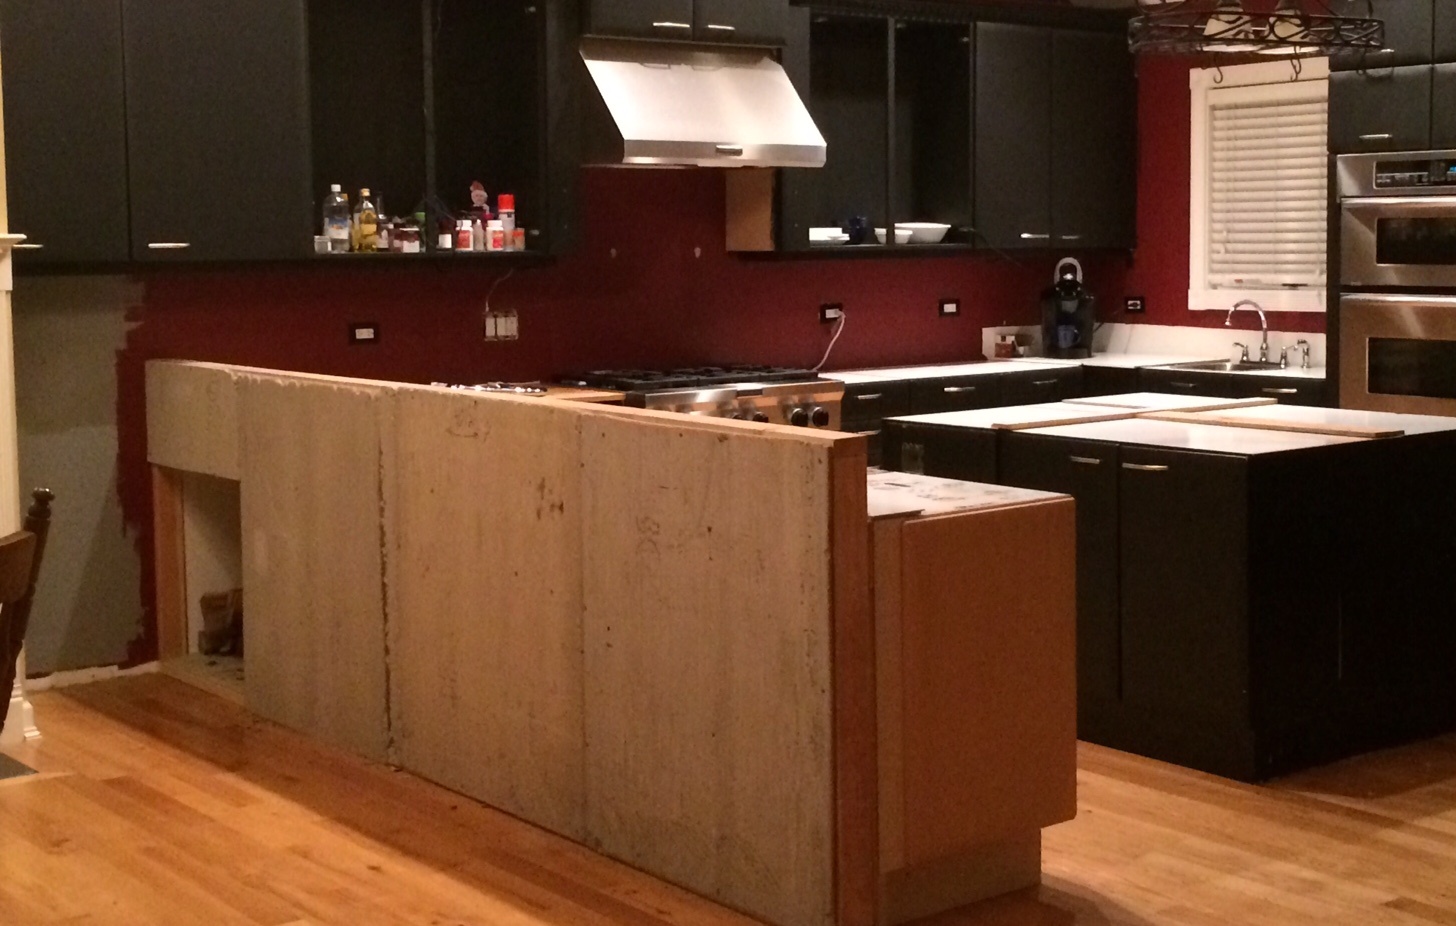 The island was made from a wooden frame, with sheer flat surfaces.
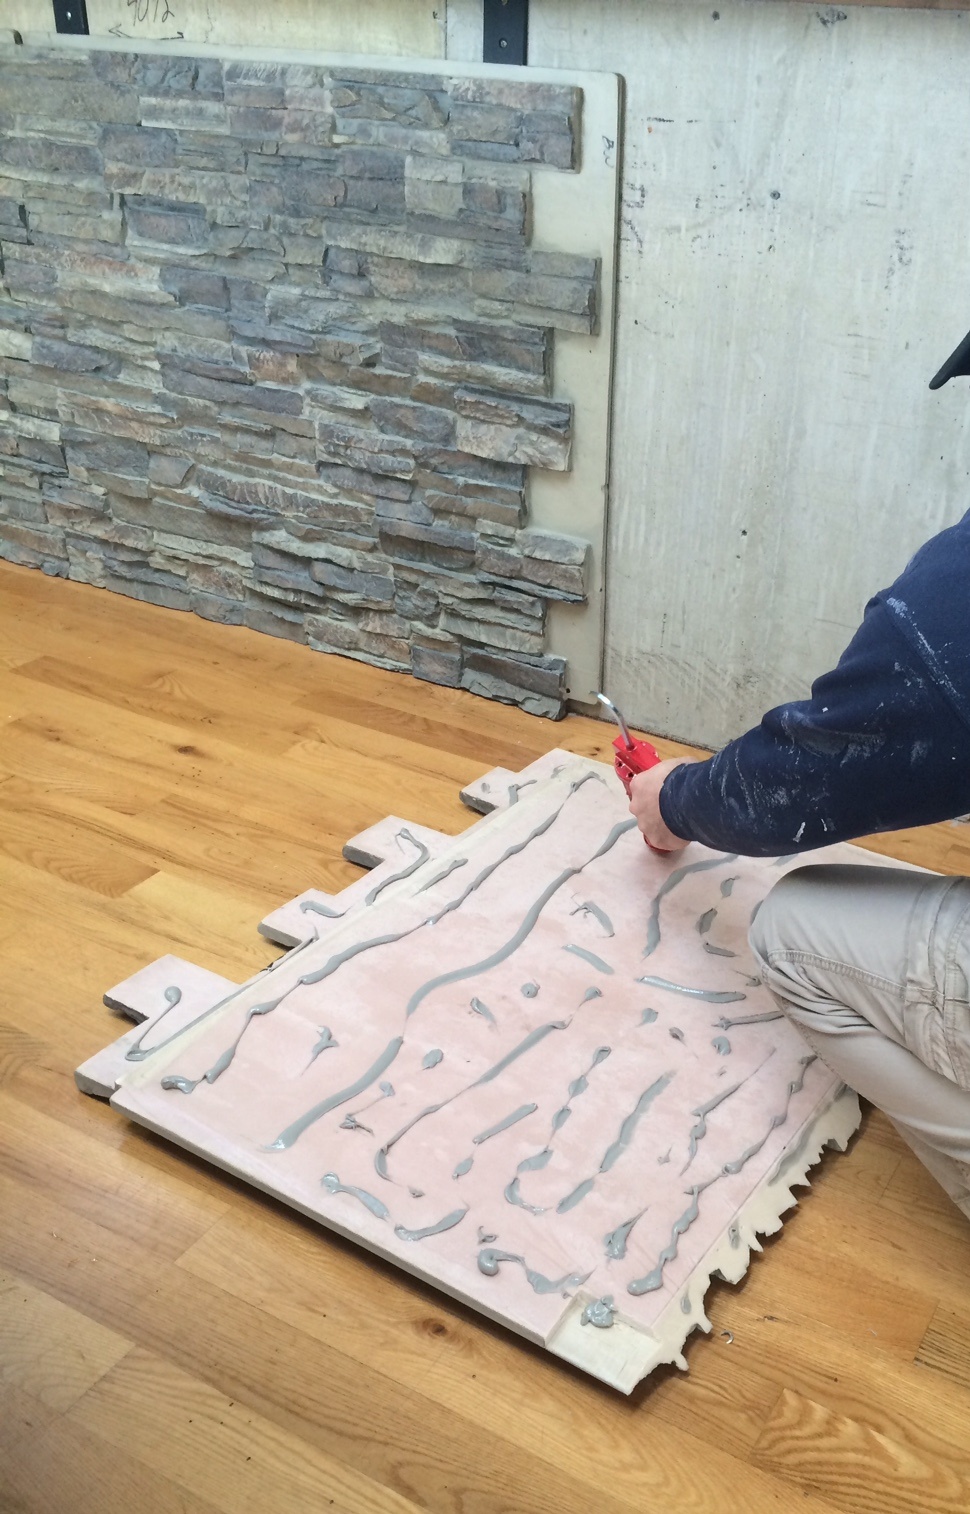 Regular construction adhesive was used to secure the panels to the flat surface.
 Screws at key places ensured a great installation.
With that tool, plus some careful measurements, the entire kitchen project was completed in a fraction of the time - and at the fraction of the cost - of using real stone. And, thanks to the design of our interlocking panels, the finished project had a seamless finish that was practically indistinguishable from real stone.
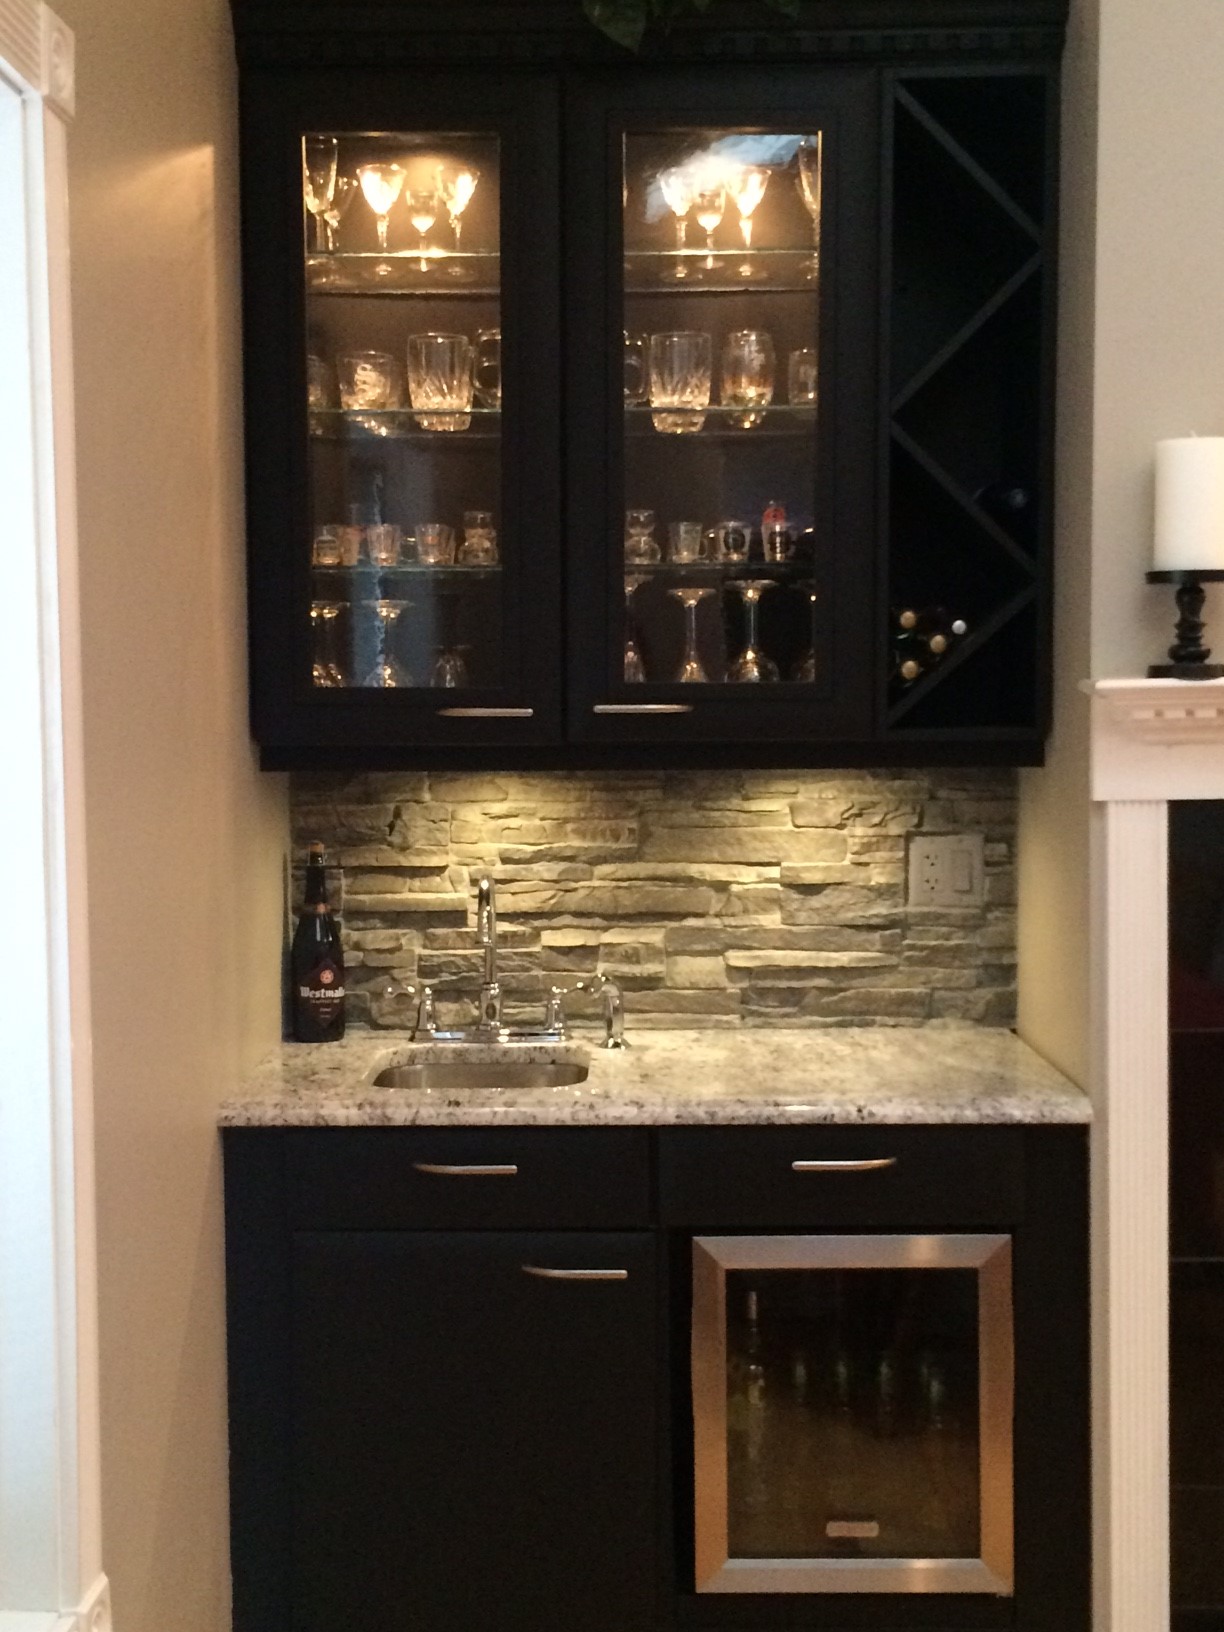
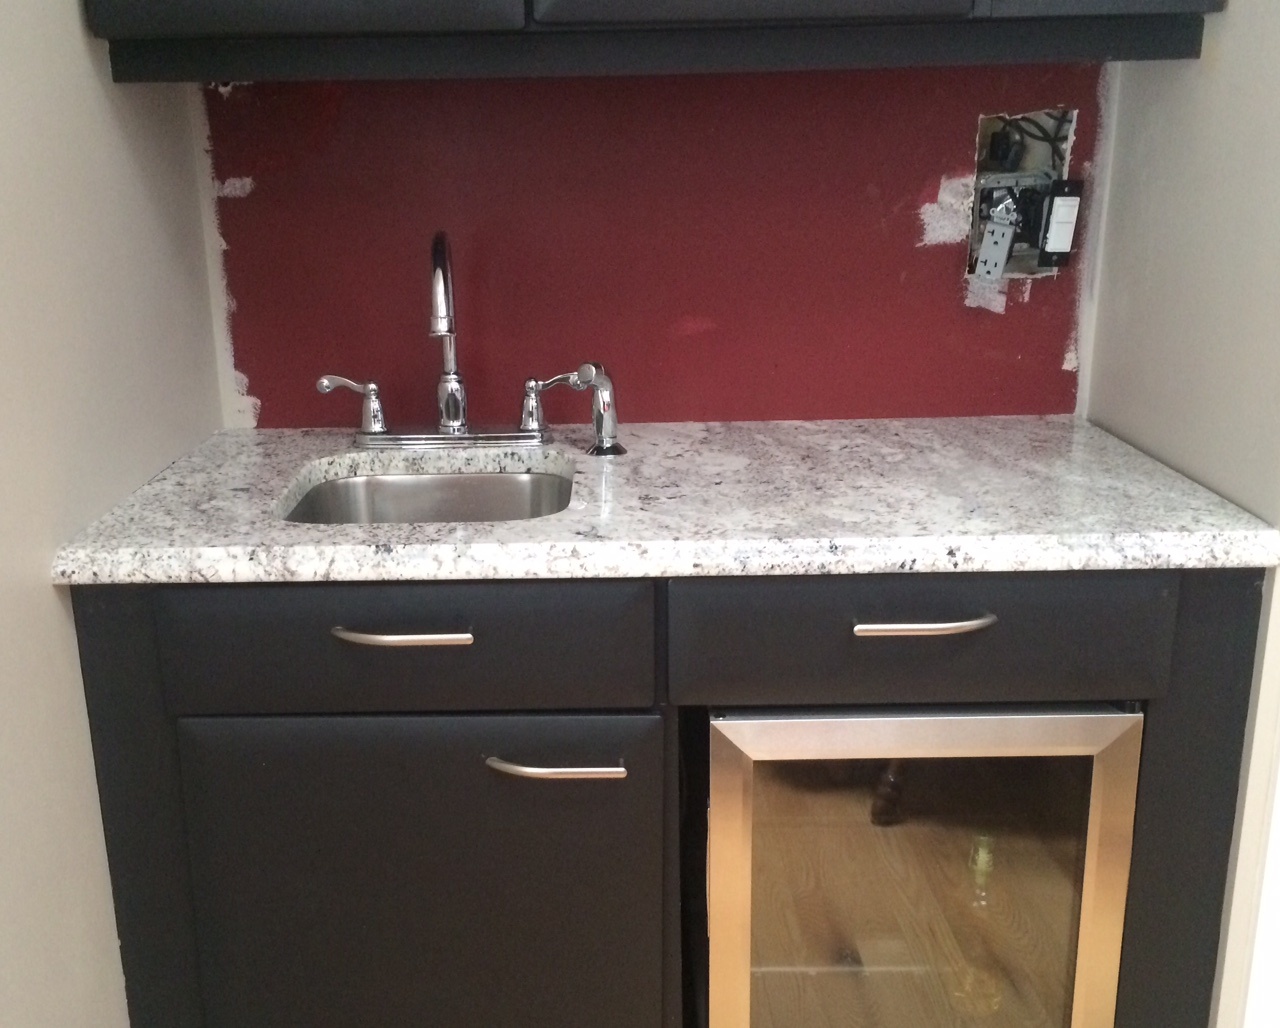 BEFORE: The wetbar also needed a backsplash.
 The counter top and outlet sockets needed to be carefully measured and accounted for.
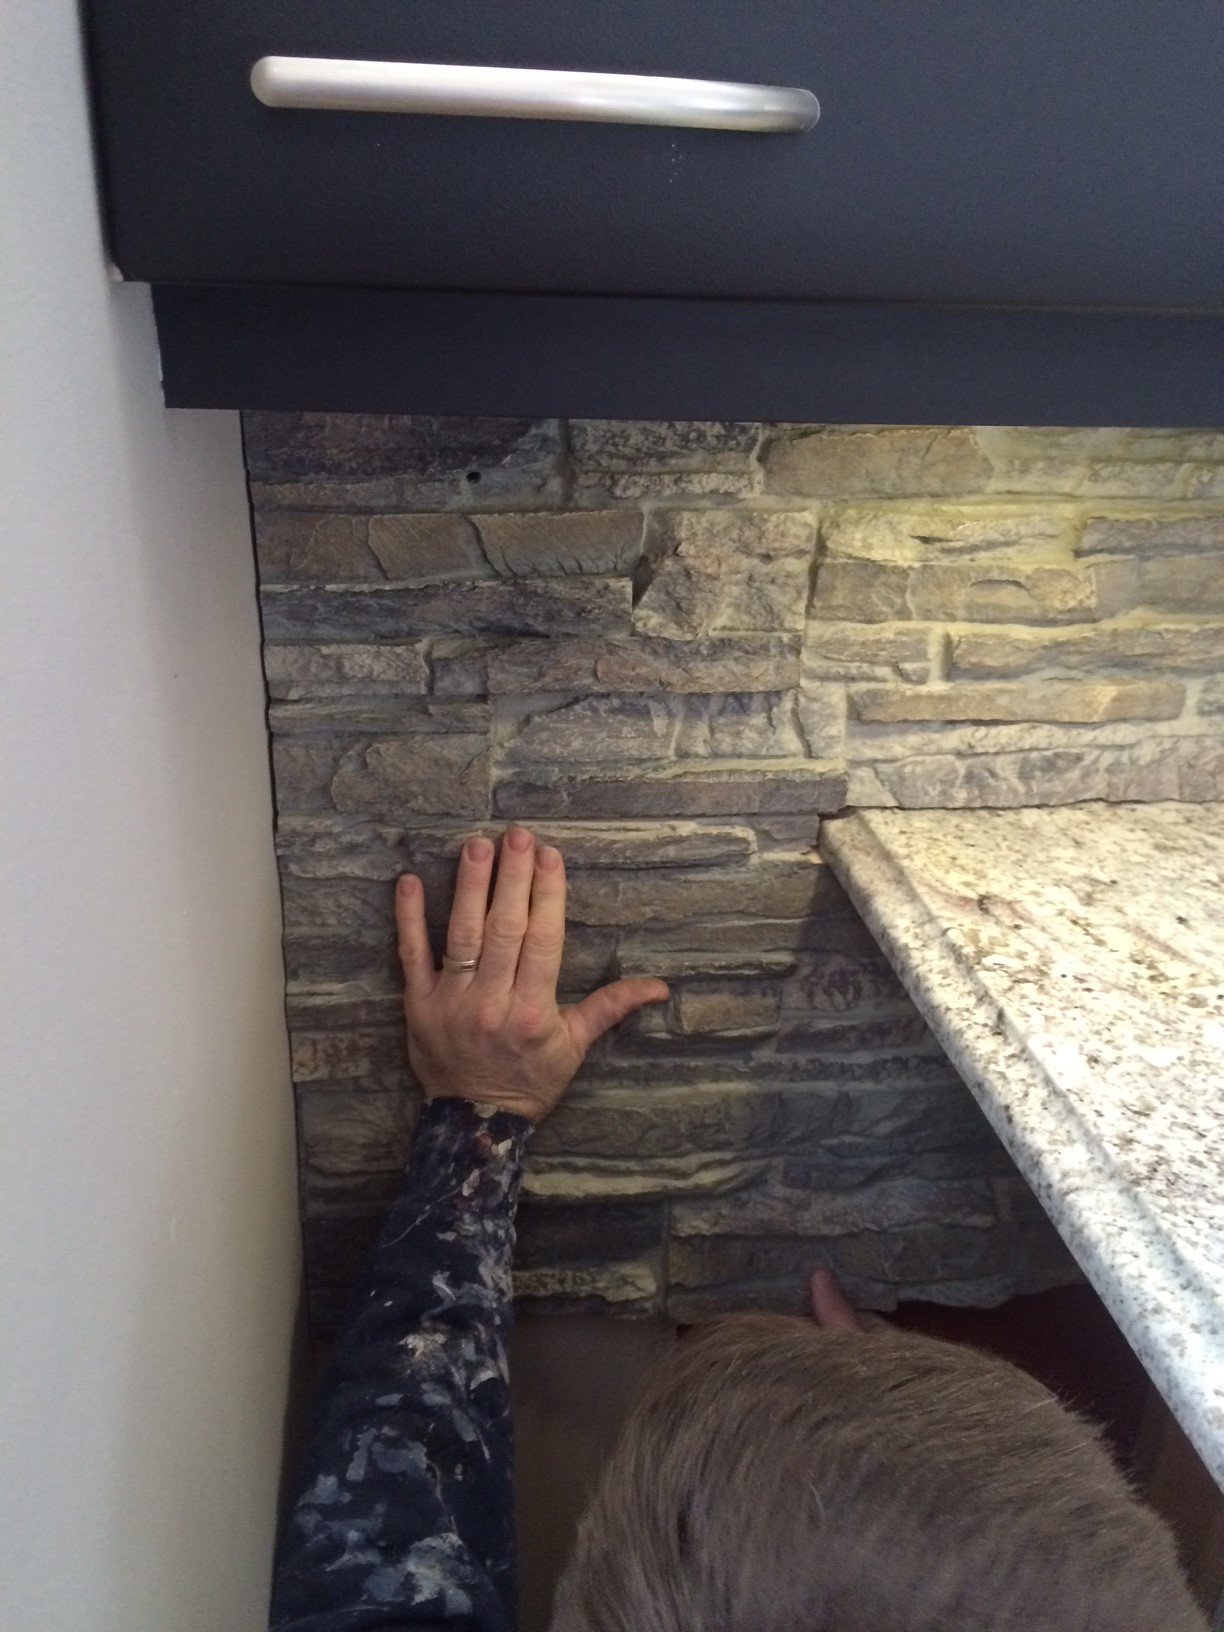
 The finish was functional and seamless. Amazing job!
Thanks for the photos, Steve! The kitchen looks great. We also really appreciate the tip!
Shop Related Products


