
FauxPanels.com customer Brian sent in pictures of this simple, yet stunning kitchen island makeover.
You don't have to cover your whole house in faux panels to have your project featured on this blog. In fact, some of the best projects we share are elegant in their simplicity. Such as this one - sent in by Brian, who used Carlton Cobblestone panels in the sleek and subtle Smoke color to resurface his kitchen island.
As you can see from the BEFORE picture, there wasn't anything glaringly wrong with Brian's kitchen island before he embarked on this project - but, as a Savile Row tailor might say to you when you walk in wearing an off-the-rack suit: "I think we can do better, sir."
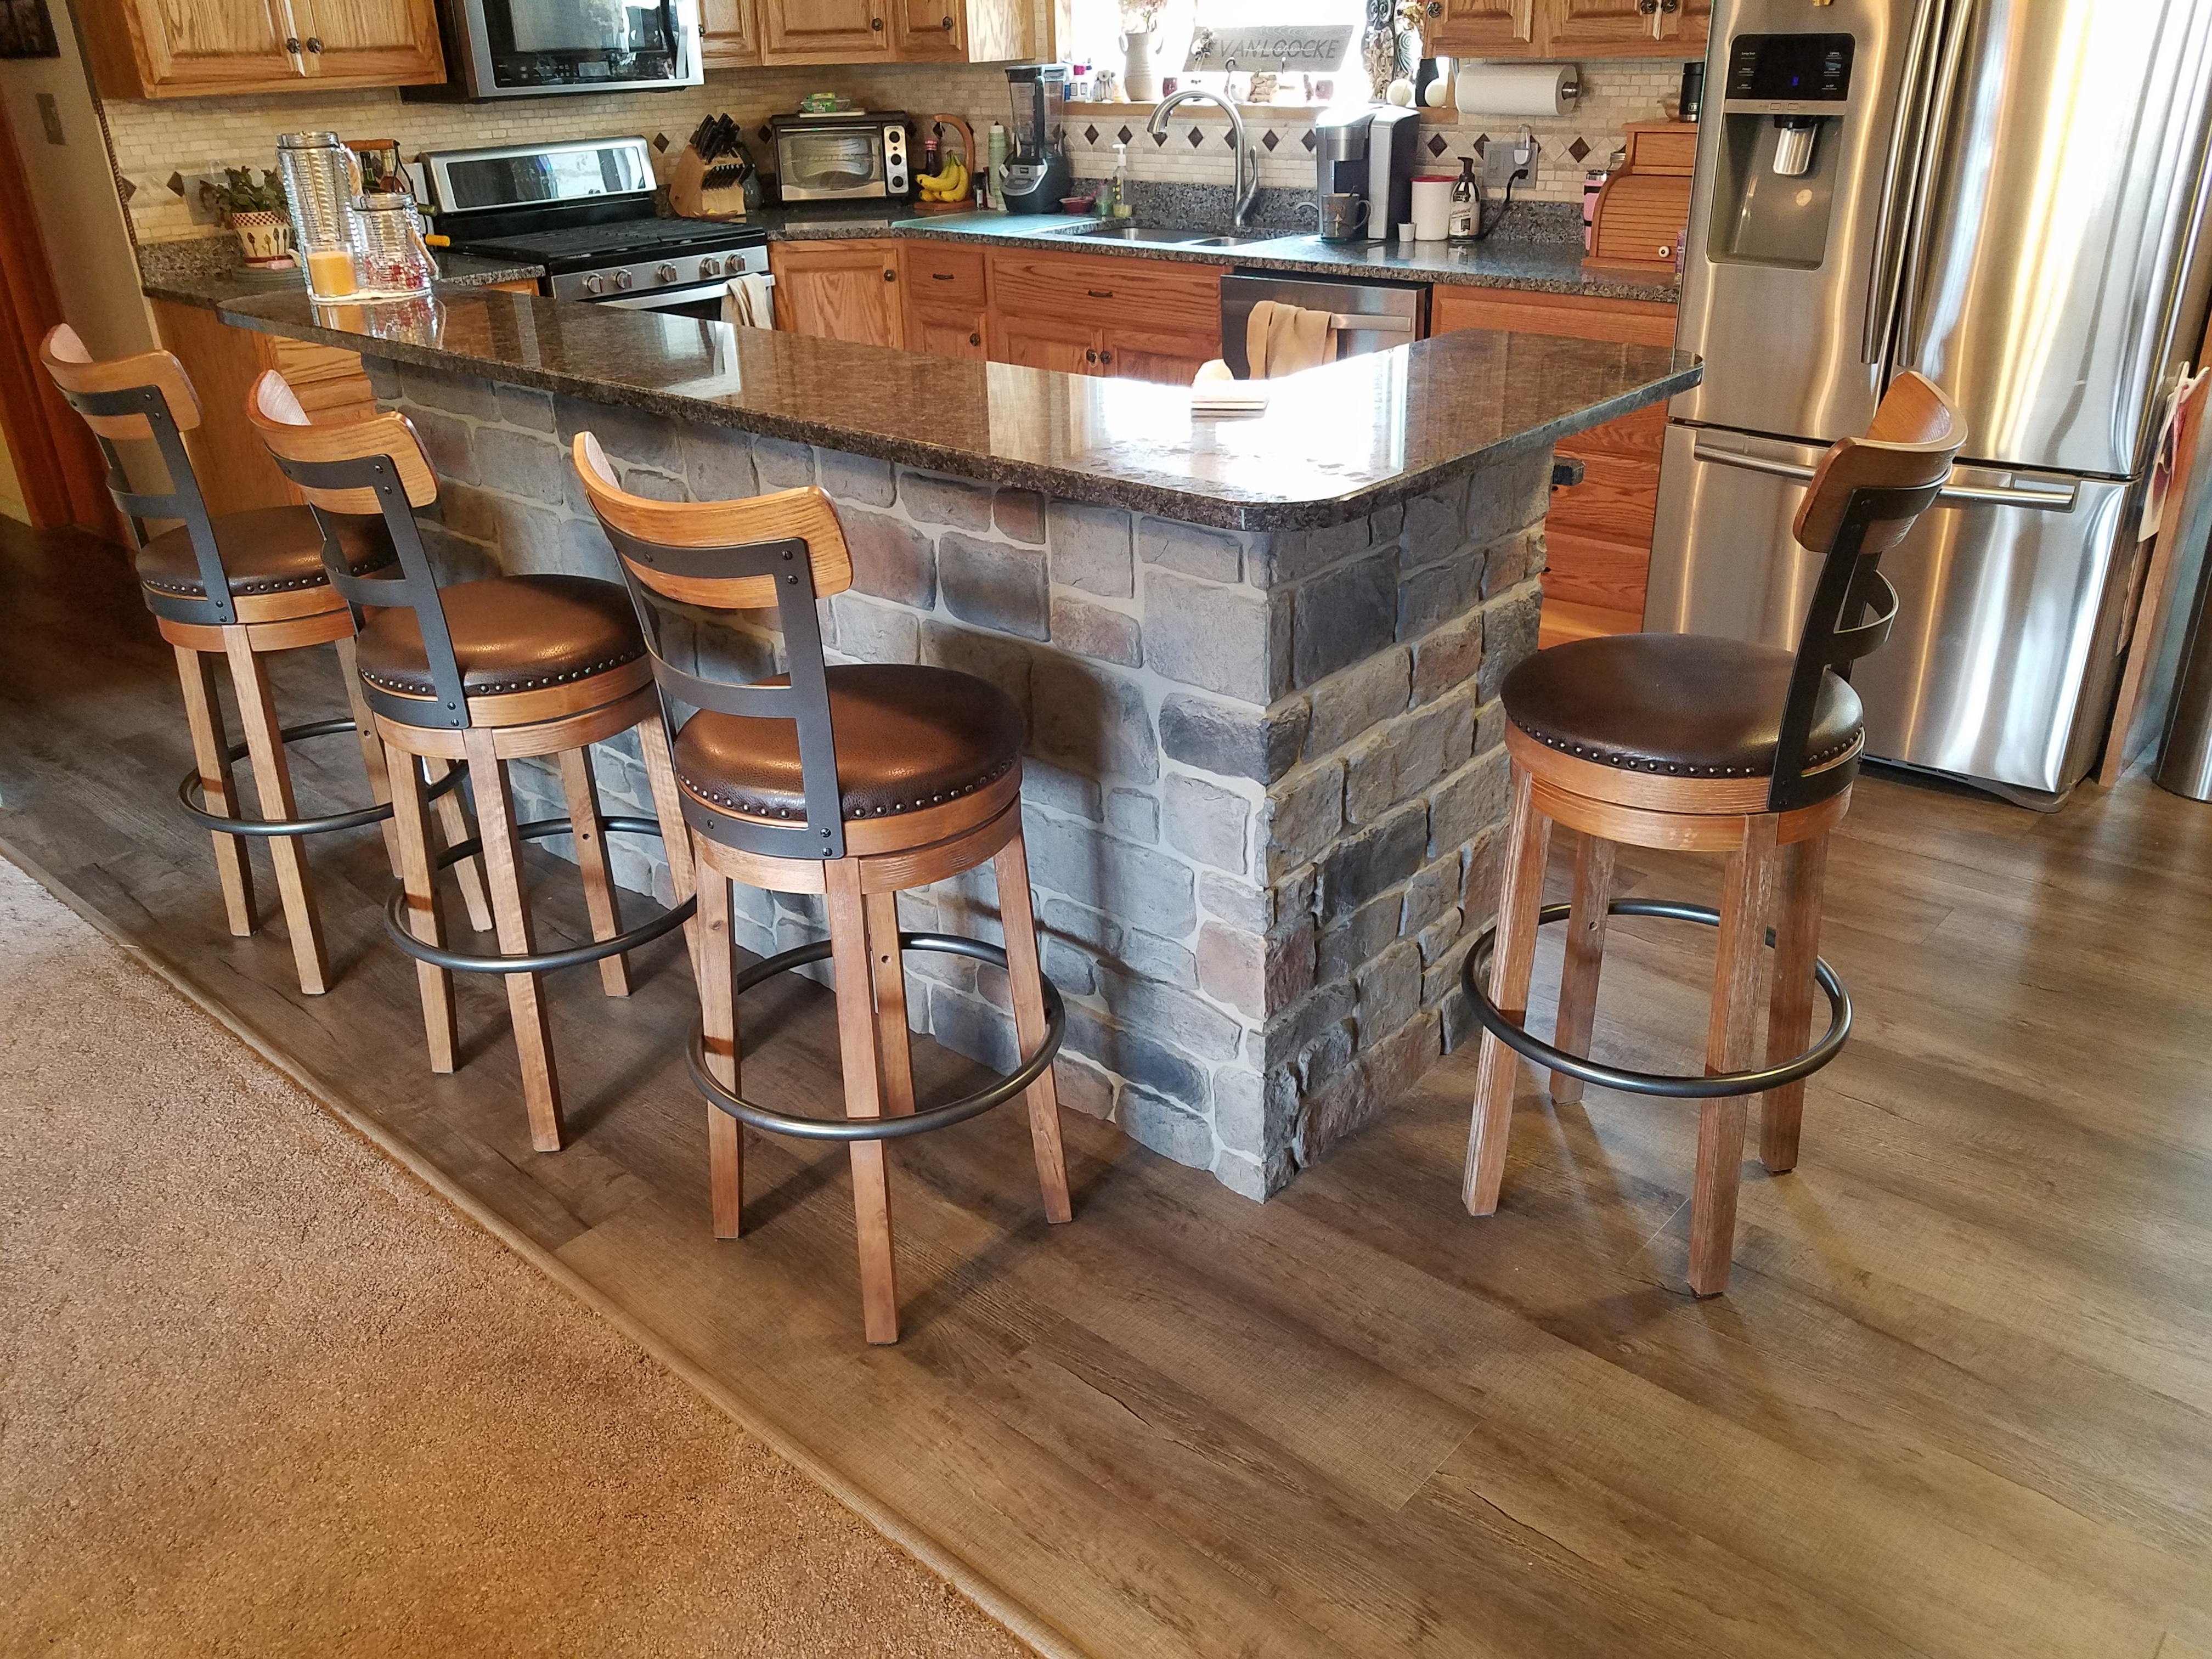 AFTER: Brian's kitchen island makeover looks terrific with its new antique cobblestone texture
In Brian's case, his island was surfaced in a drab brown finish that was so nondescript compared to the rest of the textures in the kitchen - the light oak coloring of the cabinets, and the darker hardwood floors - that it almost became conspicuous. It almost looked like the kitchen island was unfinished, because the rest of the decor in the room worked so nicely together.
There were various options open to Brian about how to proceed. A lot of people might have chosen to resurface the island in some kind of wood finish to match the cabinets and floor; but Brian saw that might be a mistake: As most of us discover with eating candy when we're kids, you can have too much of a good thing.
So, instead, Brian wanted to go for something that contrasted with the wood; yet retained the natural feel of the rest of the materials in the room. The obvious choice was stone; as stone and wood match up beautifully together, both offering a classic look.
However, the idea of using natural stone didn't appeal to Brian. It would have been prohibitively expensive to purchase, inconvenient to install and - somewhat remarkably - probably a terrible surface option for the base of a kitchen island.
You might think that stone is one of the most durable materials on earth - but when you use real stone to cover an existing surface, you normally have to install shards or slices of stone piece-by-piece with mortar and grout. While this can look spectacular, it's not as durable as you might like. On a kitchen island - where people's boots and shoes will constantly be knocking and nudging against the surface - it's only a matter of time before one or more of the pieces of individually-installed 'stone' get loosened and fall off.
So in the end, Brian chose to go faux and purchased our the Cobblestone panels instead.
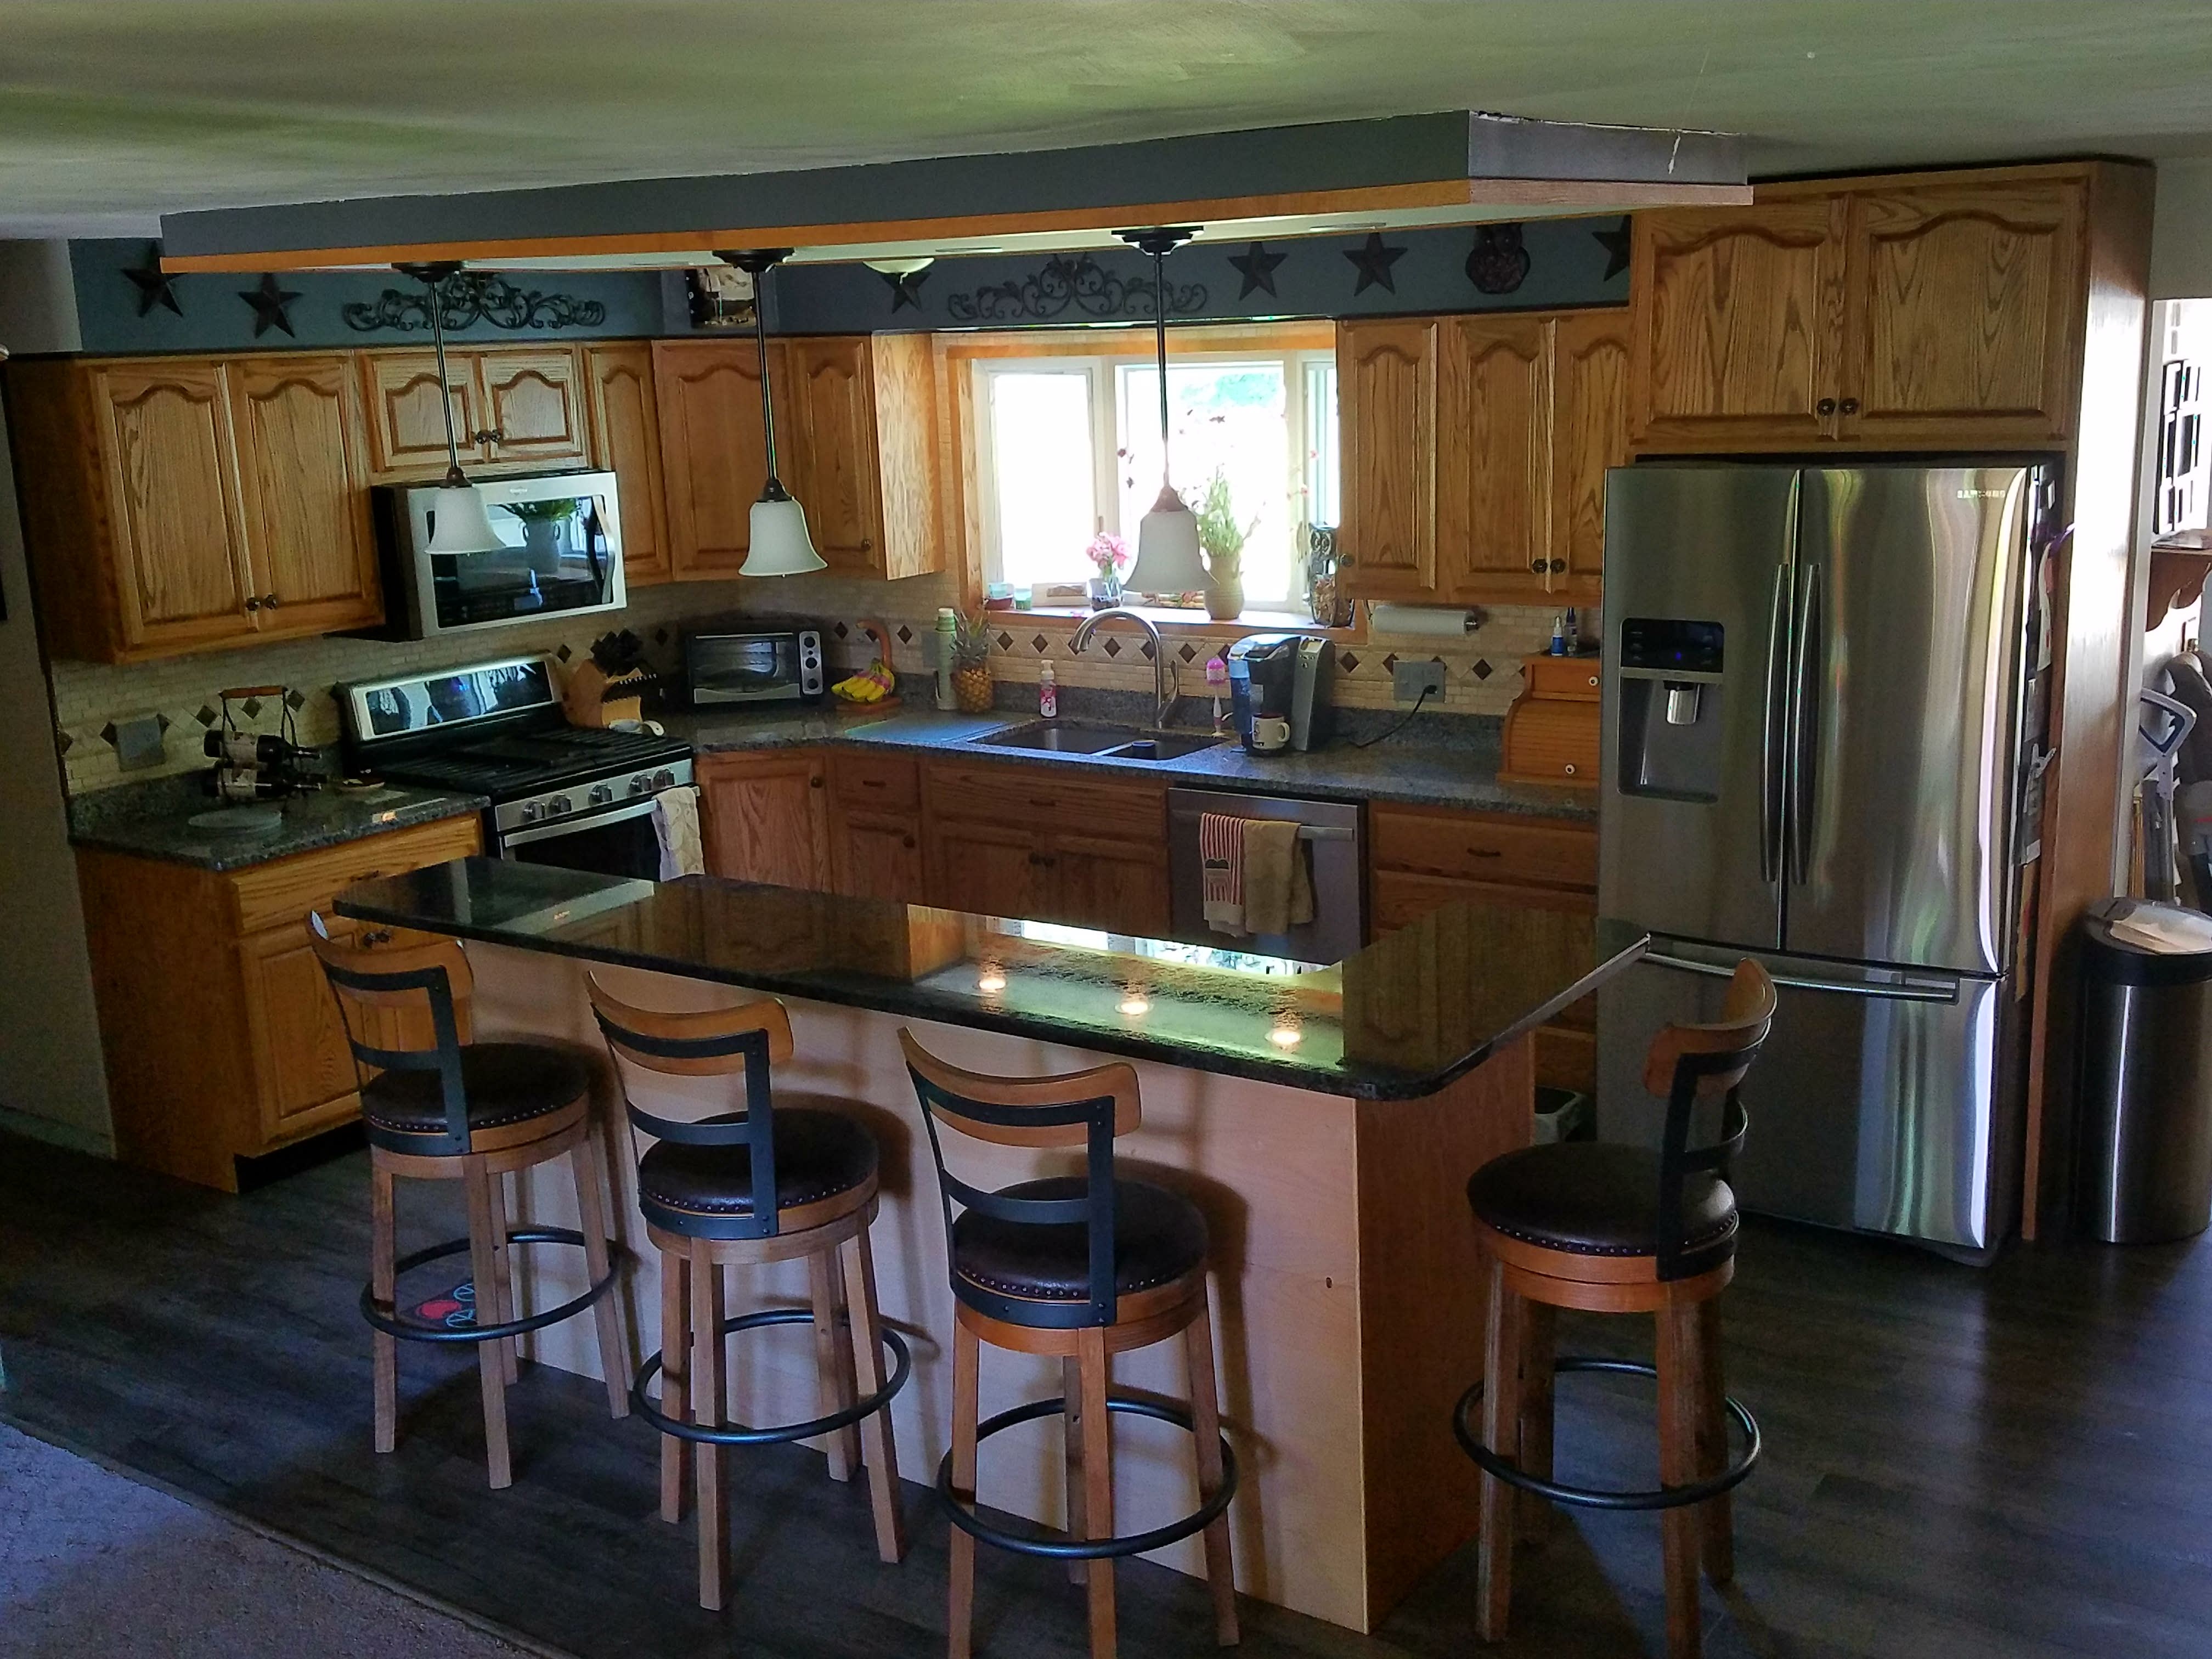 BEFORE: The flat brown surface was lacking... something. But it was ideal for installing the panels.
Carlton Cobblestone panels are made from molds taken from real stone walls - ones originally built with hand-hewn bricks of varying sizes. Using an innovative injection molding process, we recreate every detail of that stone surface in a tough, durable and lightweight polyurethane panel - which can then cover nearly 10 square feet in vividly realistic stone texture.
For Brian, this offered an affordable way to surface his kitchen island in realistic-looking stone; but it also made the installation quick and easy. After measuring and cutting the panels to size using a regular wood saw, Brian attached them directly to the smooth surface of the island with construction adhesive. Each panel features the pattern of nearly 40 individual 'stones' and it was a boon to be able to install all of them with a single panel, instead of hand-laying them one-by-one, which is what he'd have had to do using real stone.
In addition, the panels are waterproof and resistant to stains and moisture; making them ideal for installing in a kitchen. In fact, the biggest challenge in the project was getting the corners right - and as you can see from the AFTER picture, Brian did an amazing job. He mitered the corners - shaving off a 45-degree slice from each edge, so the panel would 'fold' over on itself to retain a seamless pattern even as it fitted over a 90 degree corner.
As we wrote above, the project was simple, yet stunning. It was a quick, affordable installation that totally transformed the look of the room - and really matches the rest of the decor. In fact, the Smoke coloring Brian chose even matches the granite counter-tops in the kitchen, and blends beautifully with the tile back splash. It's a really nice addition and just goes to show that understatement is sometimes underestimated.
We love everything about the simple elegance of this project, and are thrilled that Brian shared these pictures with us - but what do you think? Let us know in the comments section below.
Shop Related Products


