
Check out how to easily remodel a fireplace surround like Mike and Chris Grace did using our best selling Somerset Dry Stack panels in Tierra Gold.
Remodeling a Fireplace Surround on an Angled Wall
 BEFORE: Mike and Chris' fireplace was set against an angled wall; making it ideal for using the panels instead of real stone
“Our fireplace is on an angled wall all by itself,” wrote Mike Grace, when he sent in these before and after pictures, “so we thought it lent itself naturally to a unique treatment.”
“We originally thought about simply painting it a different color, but then decided brick or stone would have a much greater visual impact.”
The problem, of course, was that brick and stone are not the easiest or most affordable materials to work with; especially inside.
“Since we were working on an inside wall, we were concerned about the weight of installing natural stone. This would have required more work and more money.”
This is why the Graces eventually considered other options: “We chose your panels for several reasons, but the most important was simply ease-of-use.”
Unlike using real stone, which would have to be painstakingly hand laid and mortared, the Somerset Dry Stack that Michael and Chris chose could be installed on their interior wall with nothing more than trim head screws.
“We also liked the huge variety of finishes and colors there are to choose” Mike admits — explaining that he and Chris bought samples to agree on texture and color before installation.
“The samples we were able to order ahead of time really helped us make the decision – and they’re why we’re still very happy about it!”
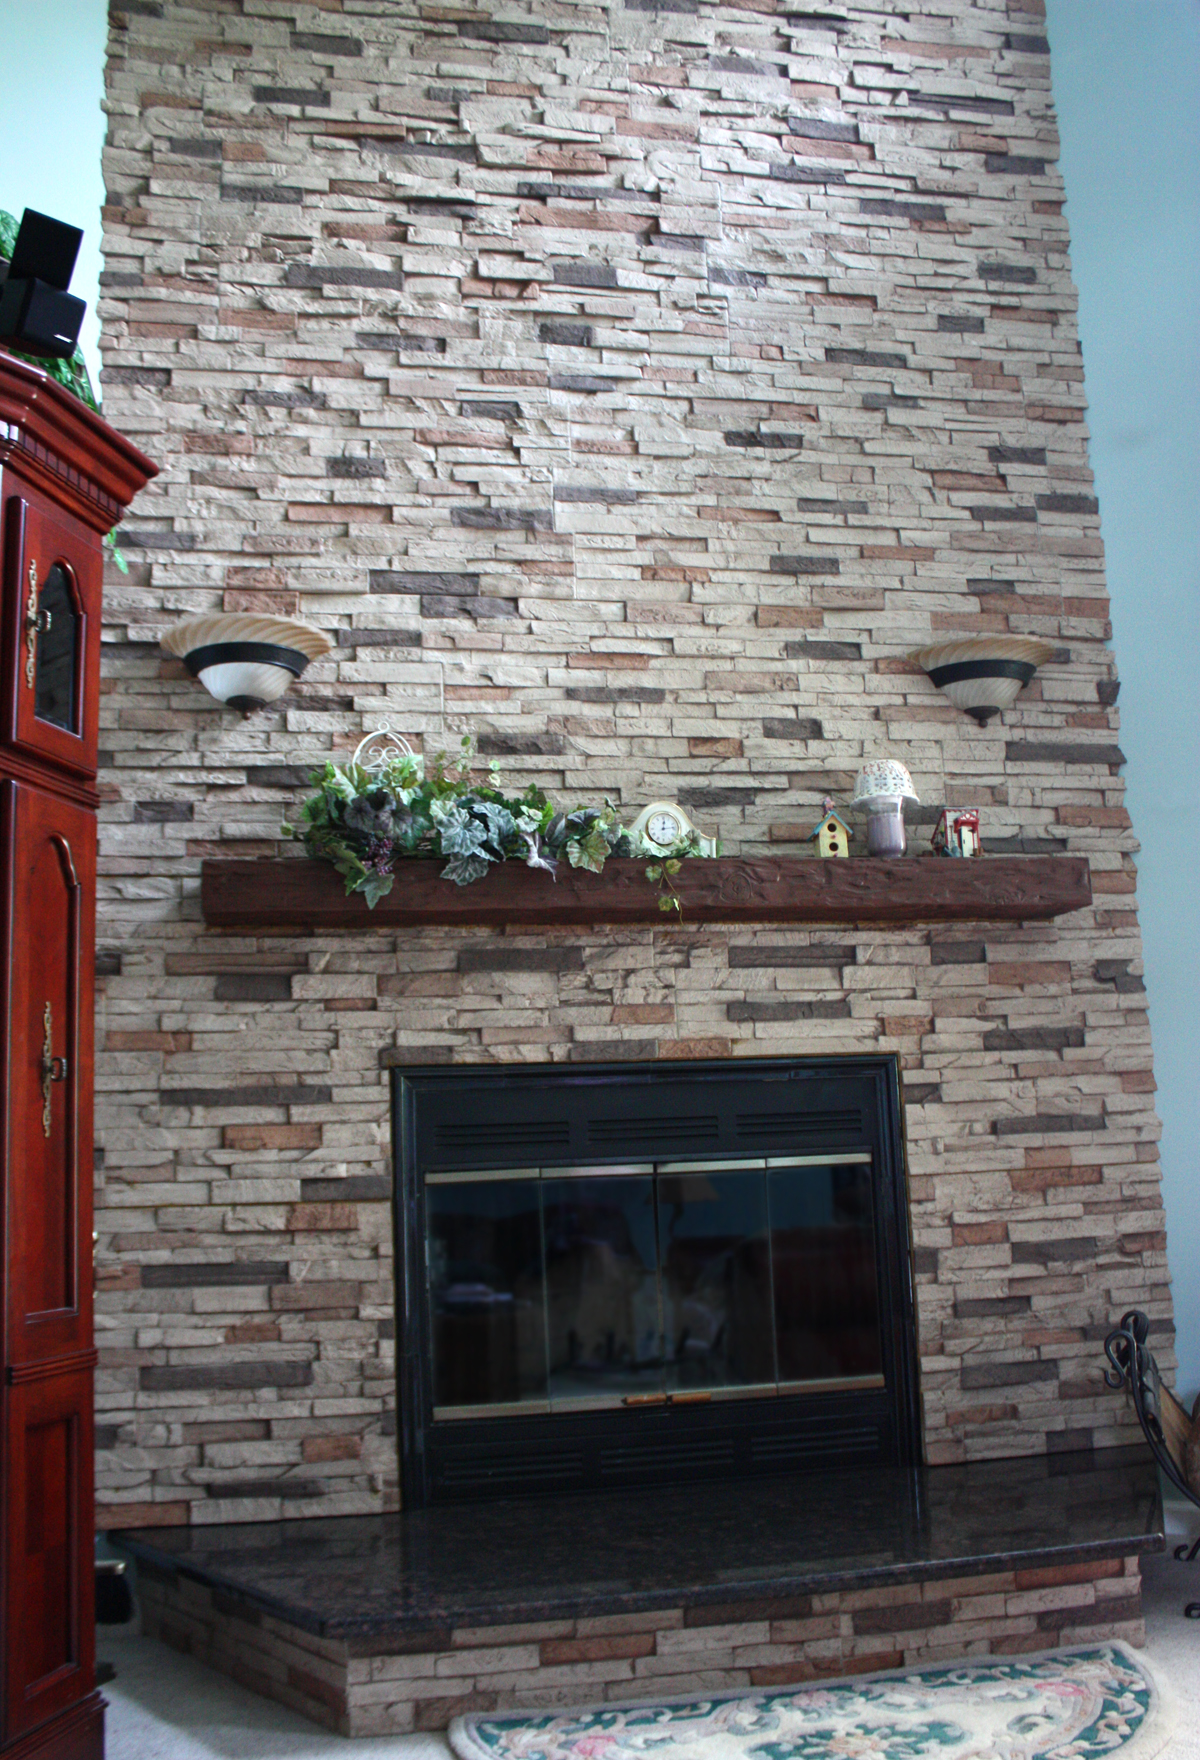 AFTER: The completed fireplace surround with mantel is breathtaking
Installation of the surround was straightforward:
“We laid three or four of the panels out on the floor first, to make sure we liked the look before we hung it on the wall. Then we installed them using screws, just like the installation instructions recommend.”
Mike has some great tips for other people considering similar projects:
“Make sure to put the installation screws in an inconspicuous location so they won’t be noticeable.”
The texture of Dry Stack makes it easy to hide the screws beneath the crags and nooks of the panel; but you can touch them up with caulk if they’re too visible.
“Also, it helps to stagger each row of panels so you don't have a telltale joint that's really noticeable.” A final tip? “Purchase the matching paint. We used it to touch-up the outside edges where we had to cut the panels to fit our fireplace.”
The end results are really amazing – including the use of a Tuscany mantel to complete the project. Mike and Chris are thrilled:
“Friends and family have told us that it has totally transformed our room and it looks much more intimate and cozy.”
Do you agree? Let us know!
Shop Related Products


