
It takes vision to turn a house into a home; and these pictures sent by Jack and Linda Juhola of their great room ceiling demonstrate how that process goes.
We love sharing pictures of our customers' projects using products from Barron Designs. Some are simple, some are complex, but they all end up looking great.
These pictures tell a little more of the typical story, though. This 'before' shot demonstrates just how much thought goes into a truly spectacular ceiling project.
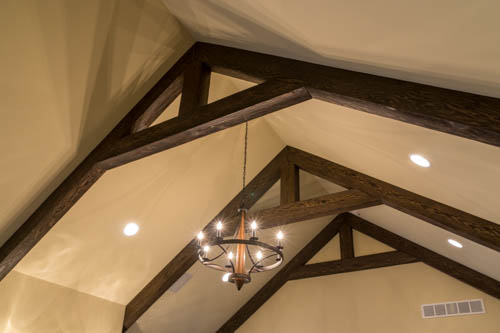
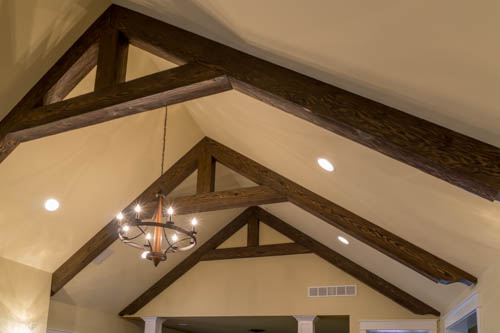 AFTER: The completed great room trusses look incredible
Jack and Linda's new home consisted of two beautiful central rooms, the 'great room' and the dining room.
"Here's a recent picture of our Great Room where the beams will go," Linda wrote to us. "I took the picture from the Dining Room. The short cabinets and columns delineate the division between the two rooms."
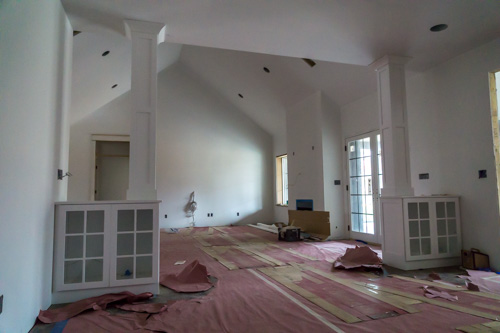 BEFORE: The mounting blocks map where the beams are going to go.
This 'before' picture doesn't show any installed beams - but what it does show are the mounting blocks that will be used to install them. On the sheer, white walls and ceiling, Lina and Jack mapped out where they wanted the beams to go before installing the blocks.
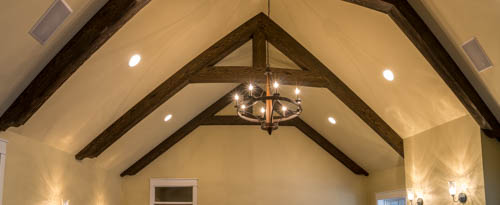 The beams are cut and assembled in the modified king truss style
The trick to really good-looking designs using faux wood is to go back to how real wood beams would have been used in the past. As structural supports, there's a physics to their placement that needs to be mirrored to get a really authentic-looking design.
That's something Linda and Jack did a brilliant job of - planning where the beams would go, so they'd resemble the pattern of actual exposed beams had their house really been made from a wooden frame.
But it took a lot of thought, planning and measuring to turn that vision into a reality - and these mounting blocks serve always like a 'join the dots' to where the beams will eventually go.
Fortunately, once the Juholas had mapped out the placement of their beams, installation was easy. The beams could be cut to size with a regular wood saw - including the 45 degree angles where the apex of the beams meet. Then they were mounted on the blocks with regular wood screws; for a secure install in just minutes.
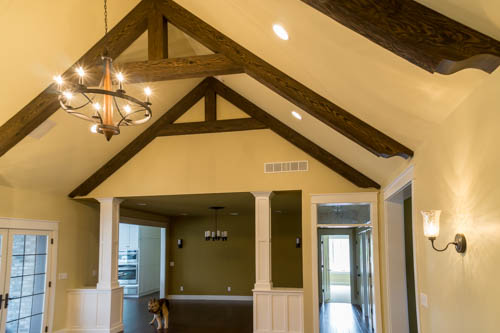 The pattern of these beams mimics how real beams would have supported the ceiling of a traditional wood framed house.
The finished design looks incredible, and the beams so realistic. And it's great to have the 'before' picture for context - it really illustrates how much planning and thought went into the project.
Shop Related Products


