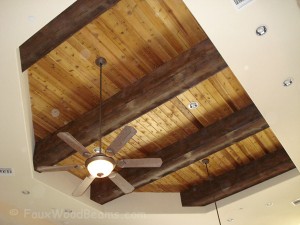
One of the reasons our beams are so popular is because they perfectly mimic the texture and look of real wood – right down to the grain, saw marks and imperfections. For some, though, these characteristics aren’t imperfect enough – and some enterprising customers have taken it one step further using wood stain.
Faux Wood Stain Tips: Painting Knots on Beams

“Knots” are dark spots in wooden beams and planks that reveal where branches used to grow.
These areas often feature a different grain pattern and a distinctly different color – and some faux wood enthusiasts want that look for their own beams.
Fortunately, it’s straightforward to get the knotty look. We have a full guide to making your beams look like knotty pine – but here are the basics, and some additional ideas.
Firstly, order your beams unfinished. All of our products are available intricately colored to perfectly resemble real wood – but in this instance, you’ll be doing it yourself. Order our beams pre-primed, or if you order Timber of Sandblasted beams, prime them yourself first.
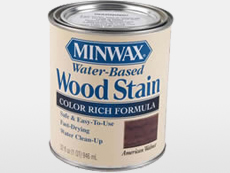
 We recommend MinWax water based stain
You’ll need two stains for this project – a dark one for staining knots themselves, and a lighter one to stain the rest of your beams. We recommend MinWax water-based wood stain, and have had some great results using their American Walnut stain for the knots, and English oak for the rest of the beams. Experiment with your own color combinations before you begin.
Look over the entire length of your beams to locate any knotty textures. These are where you’ll apply your knot coloring. Because our beams are molded directly from real wood, the knots you’ll find will be exactly where they would be on real timber.
 Paint your knots over the knotty textures molded directly onto the beam
Next, paint your knots directly onto the knotty patterns of your primed beams. You want to paint them to resemble an oval, just like they’d appear in real wood. Google some images of knots before you begin to get a good idea.
After painting, blot any excess stain from the knot pattern. This will bring out the grain pattern and make the knot appear more realistic. Remember to leave them to dry fully before you proceed!
Finally, use your lighter stain for the overall finish. This should give the beams the beautiful look of real timber that you’re going for – but with the addition of some beautifully colored knots to enjoy!
 Stain the rest of the beam as you would normally for a stunningly realistic finish.
Just like with the knots themselves, remember to dab off any excess stain to help bring out the grain pattern and create a more natural look.
There we go! Using this technique, you can achieve some truly stunning results. An additional benefit to staining the beams yourself is that you can use stains to perfectly match any existing wooden features, or your favorite furniture items.
And if you’ve tried our knotty technique – let us know about it! Being added to our photo galleries or used in a future blog post could net you cash or credit towards a future purchase. Email us pictures to contact@barrondesigns.com. We’d love to see the results!
Shop Related Products


