Steven S. recently sent us pictures of his awesome living room remodel - completed using our Custom Rough Sawn ceiling beams in Oak.
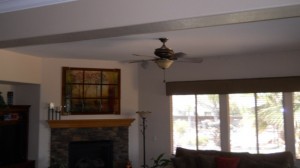
 BEFORE: Steven carefully planned where his beams went, to make sure they seamlessly blended with his existing decor.
Faux Oak Ceiling Beams Add "California Cool Feel"
Check out these photos and you'll understand why we were excited to receive this email from Steven S. of Sacramento, CA.
In these pictures, he's documented the vital steps needed for proper installation - and the results couldn't look more spectacular.
Steven selected our popular Rough Sawn Beams for his DIY project; using them to add a classic ceiling design element to his modern home. He ordered the beams in vividly realistic Oak - which matches the color and hue of wood commonly used for real wooden beams in California.
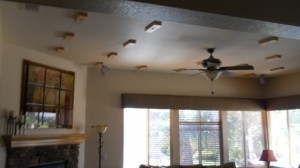
 DURING: These mounting blocks were carefully measured to make sure the beams looked perfect once installed.
Installing the beams is a straightforward process and in the pictures you can see how Steven followed every step.
Planning: Steven eventually installed six beams - and in order to make sure they looked like an integral part of his home's existing structure, he carefully measured out where best to place them. This included measuring an exact distance between each beam so they aligned perfectly and created visual symmetry.
Installation: Next, Steven installed mounting blocks for all of the beams in one single step. To mount faux beams, you simply attach a wooden mounting block to the ceiling with regular screws. Our u-shaped hollow beams then slot right over the mounting blocks and affix with screws; making the beams attach seamlessly to the ceiling. By placing all the mounting blocks at once, Steven was able to measure the distance between them more easily.
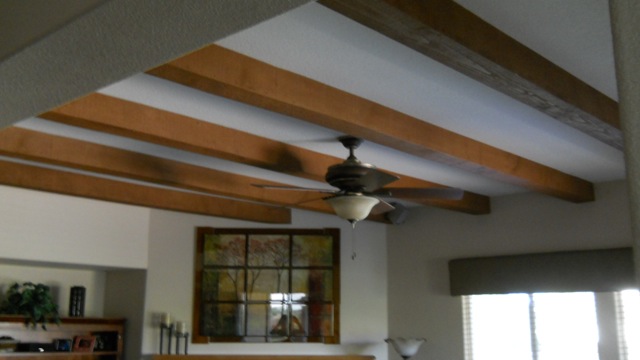
 AFTER: All that planning paid off! Steven's faux oak beams look amazing!
The Finished Product: Steven's pre-planning clearly worked out. You can see from this final picture how great the beams look. Steven was able to cut them perfectly to size using a regular wood saw, which meant each beam seamlessly runs the length of the ceiling to look like real structural timbers.
We love receiving pictures like this, as they serve as a great guide to other customers about how to install their beams. If you have similar pictures, we'd love to see them. Be sure to email them to us at info@fauxwoodbeams.com.
Shop Related Products


