Here's a neat trick for painting and finishing beams.
 The vivid textures of our unfinished products make them perfect for drybrushing.
Dry Brushing Paint or Stain onto Beams
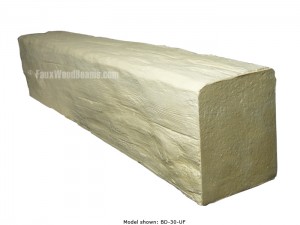
Our beams and other faux wood products are available finished in a variety of real-wood colors; all intricately detailed to perfectly mimic the look and hue of authentic cedar, oak, walnut and other natural woods.
But for homeowners looking to match the faux with existing wooden features - or just want a more personalized look - many of our products are available unfinished. You can stain or paint them yourself to achieve any look conceivable!
We have great guides to painting and finishing your beams here, plus blog posts that cover cool tips and tricks like staining knots. But one interesting technique we haven't covered before is the art of drybrushing.
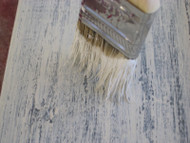
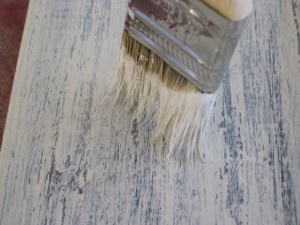
Drybrushing is a finishing method used to highlight the texture of surfaces; and is particularly well-suited to finishing our products which possess rich, authentic textures taken from molds of real wood.
Drybrushing is almost the exact opposite of staining - in which dark colors pool into the crevices and cracks of textured surfaces to make them appear darker and more pronounced. In contrast, drybrushing involves adding a lighter color to the raised areas of a textured surface; which is especially useful when painting or staining in lighter colors.
You will need:
- A base-color paint or stain
- A lighter color paint to drybrush with - we recommend water-based acrylic
- A large, soft paintbrush
- Paper towels, or dry rags
 Drybrushing is particularly effective when you're painting or finishing with lighter colors, as it highlights rather than adds depth.
To drybrush, you'll need to first paint or stain your beams in the darker of the colors you're intending to use. Leave the painted product to thoroughly dry overnight.
When you're ready to begin, dip your paintbrush in the drybrushing paint and then use your paper towels or dry rags to wipe off almost all the paint from the paintbrush. You can tell when you've wiped off enough when only the raised surfaces of your rag or paper towel are smeared with paint.
Then, use broad strokes to paint your beam with the wiped-clean brush. You will immediately notice that the brush leaves paint on only the raised surfaces; giving you a stunning, highlight finish characteristic of drybrushing.
Some things to remember:
- "Dry" is optimum word. If you wash your brush between coats, be sure to dry it thoroughly before trying to drybrush again, or the residual moisture will totally spoil the effect.
- Less is more. If you leave too much paint on the brush, you will ruin the effect just as you might with a wet brush. Make sure you wipe almost all the paint from the brush before you begin. A good rule of thumb is: When you've wiped off too much paint, you're left with just about enough.
If you've tried this technique already, and have photos to share, we'd love to see them! Send them to us at info@fauxwoodbeams.com. We might even feature them here!
Shop Related Products


