
Project Showcase: Blogger Redesigns Ceiling with DIY Wood Beams
Super-blogger Tina Bousu delighted us recently with a post on her website, Eclectic Twist. Faux Wood Beams?? Yes Please! outlines in delicious detail every step of her recent DIY ceiling project; which included staining and finishing the Rustic Beams she purchased from our site.
I definitely recommend you head over to Tina's blog to check out the post, but here are some of our thoughts.
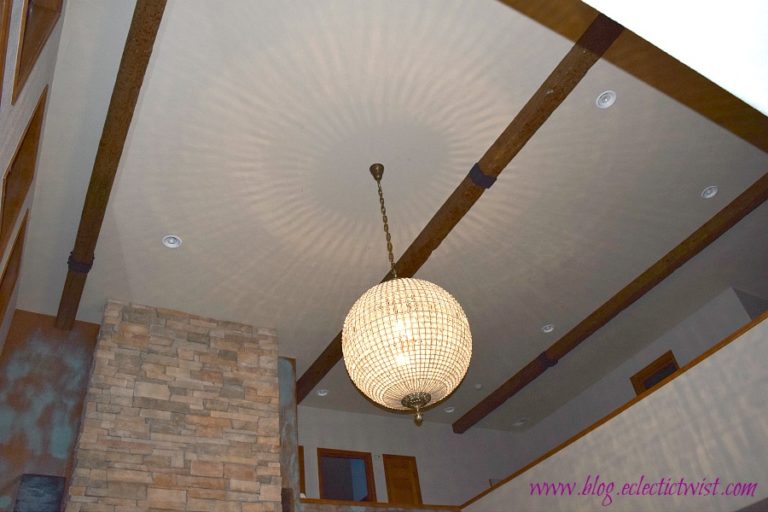 Tina's beam project finished
For five years, Tina and her big family (a husband, four human babies, plus four furry ones) have lived in a gorgeous Colorado home with towering, 20-feet tall ceilings. For just as long, Tina has wanted to do something with all that ceiling space.
"I always wanted beams," she writes. "But I’m a purist at heart so I really wanted real beams, as in thousands of pounds and need 20 men to install."
Fortunately, FauxWoodBeams.com provided a solution to Tina's problem - one that wouldn't break the bank, or the backs of any contractors.
"Nothing seemed right, until I stumbled upon fauxwoodbeams.com. I was Googling around looking at pricing and what was now available in the faux department and I really liked what I saw here. The reviews were stellar, customer photos looked amazing and the pricing was much better than I remembered from a few years ago when I looked into them."
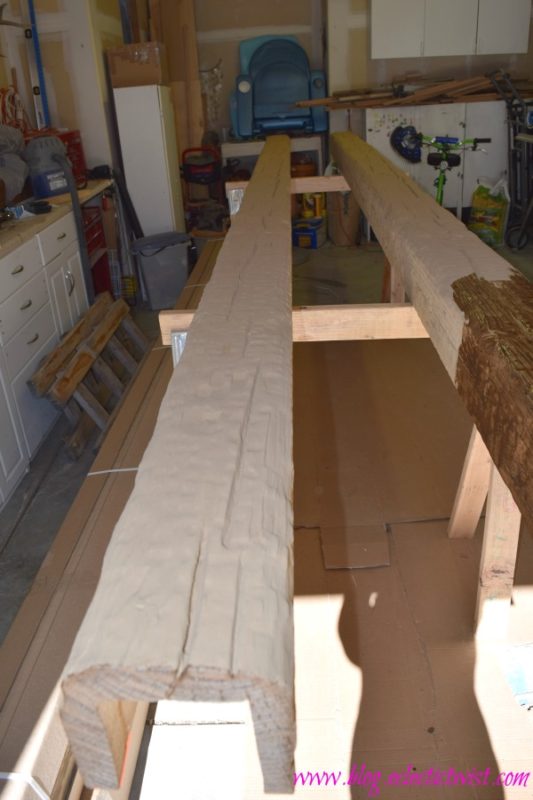 Tina stained the beams herself, and they ended up looking great.
Tina ended up purchasing five Rustic Beams. More interestingly, she ordered them in Unfinished, and planned to stain the beams herself. Not only that, but Tina blogged about every step of that process.
"I ended up using Minwax honey, darker than you think it would be on the beams, and mixed it equal parts with Minwax classic gray. I used a sponge brush to apply the stain as the point on the end helps to get in all those crevices. It took me an hour for each beam. Be careful with dripping and pooling! We let them sit and dry for 36 hours."
The next challenge was installing the beams. You need more than a stepladder when your ceilings are 20-feet tall. To that end, Tina ended up renting scaffolding, and blogs about the challenges of installing the beams so high.
"Now since my hubby has discovered he’s got a serious height phobia I climbed up there and we began installing beam number one. We followed the directions exactly as described in their written and video tutorials on their website."
"We had to cut some of the beams to fit for the length of our room which was so easy. I measured the size piece we needed exactly on the ceiling and the hubs used a regular old hand saw to cut just a smidge over that measurement," because, "you can always sand a little more or take a bit more off but you can’t put it back if it’s too short."
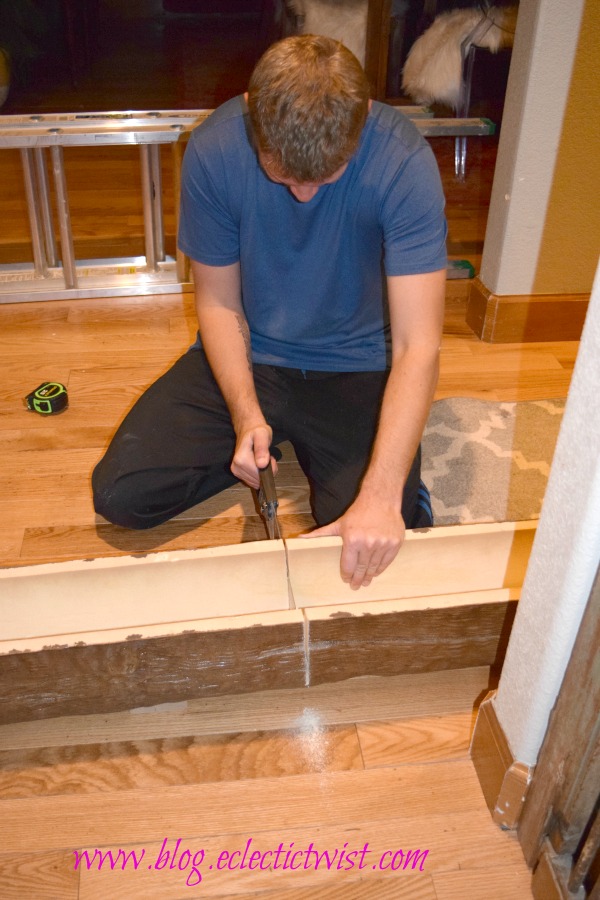 Tina's husband cut the beams to size with a regular wood saw.
Tina is certainly a cut above the rest when it comes to do-it-yourself, but she's still far from a certified contractor. Nevertheless, her efforts ended up looking fantastic - and there were no challenges she faced that were insurmountable.
"I would absolutely do this again," she writes. "Yay for beams and character and architectural elements!"
We loved this project and adore Tina's blog. Make sure to go and check it out for a full rundown of the installation process.
Shop Related Products


