
Faux Beams Based Ceiling Remodelling
We recently received these before and after photos from a customer of their complete ceiling renovation. We're excited to share them here, not only to show the beautiful results, but do demonstrate how straightforward our products are to install.
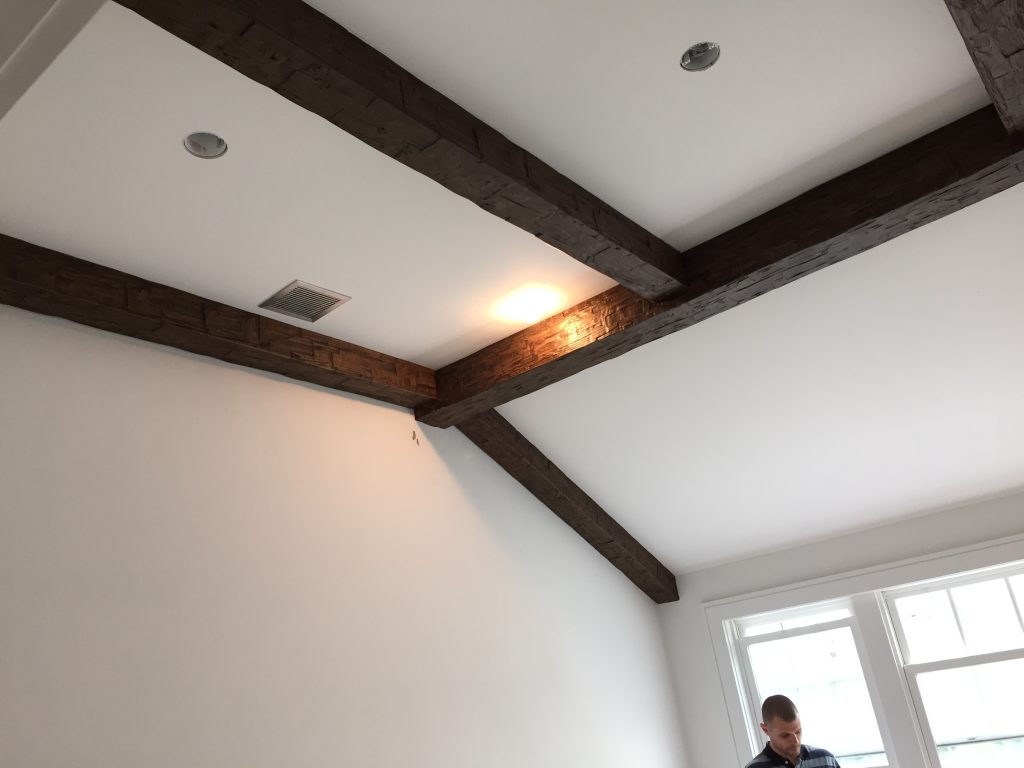
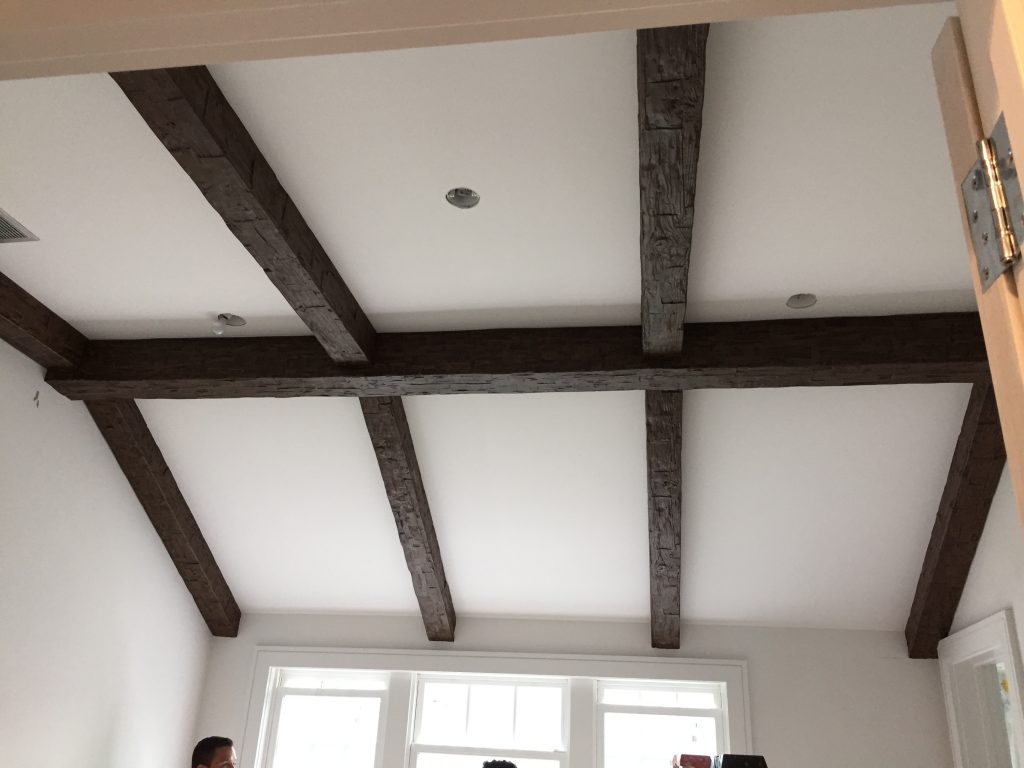 The finished ceiling project looks incredible.
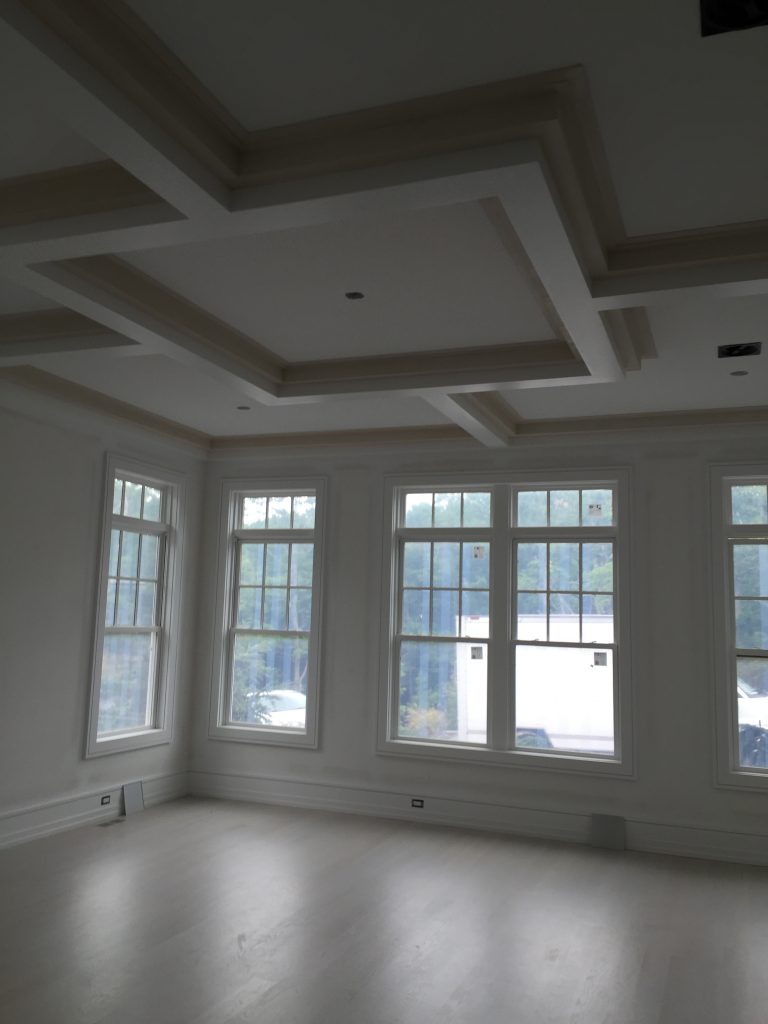
In this instance, the homeowners wanted to make their bedroom appear bigger and more open - and the first step was to tear out the original tray ceiling. Once removed, they used drywall and plaster to follow the natural roofline and create a new vaulted ceiling.
 The original ceiling was flat, and needed to be removed.
With that step done, it was only logical to add ceiling beams next, choosing the Custom Rough Hewn style from our site. In addition to breaking up all that white space, they would add a touch of classic charm in-keeping with the architecture and style of the home.
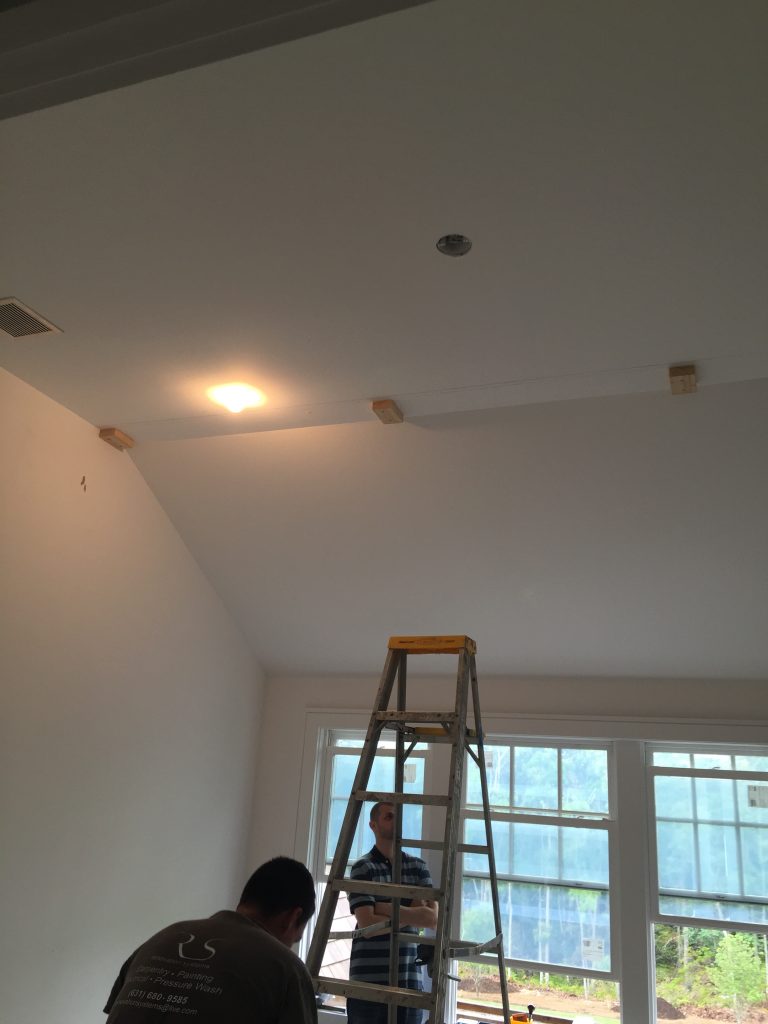 The new ceiling was finished with drywall and plaster, and then the placement of the beams was plotted out and marked with mounting blocks.
Doing their homework, the owners studied the architecture of historic timber-framed homes to determine the best layout. All the research pointed towards a large, central beam at the apex of the ceiling, and then smaller supporting beams branching out and fitting flush with the opposite wall.
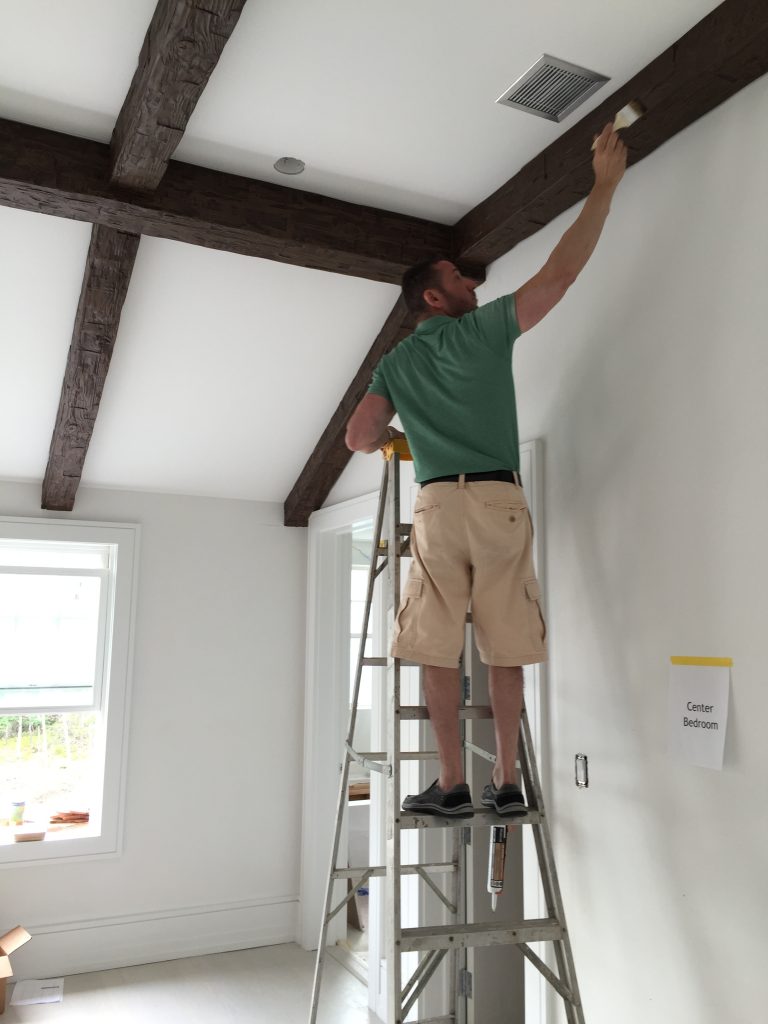
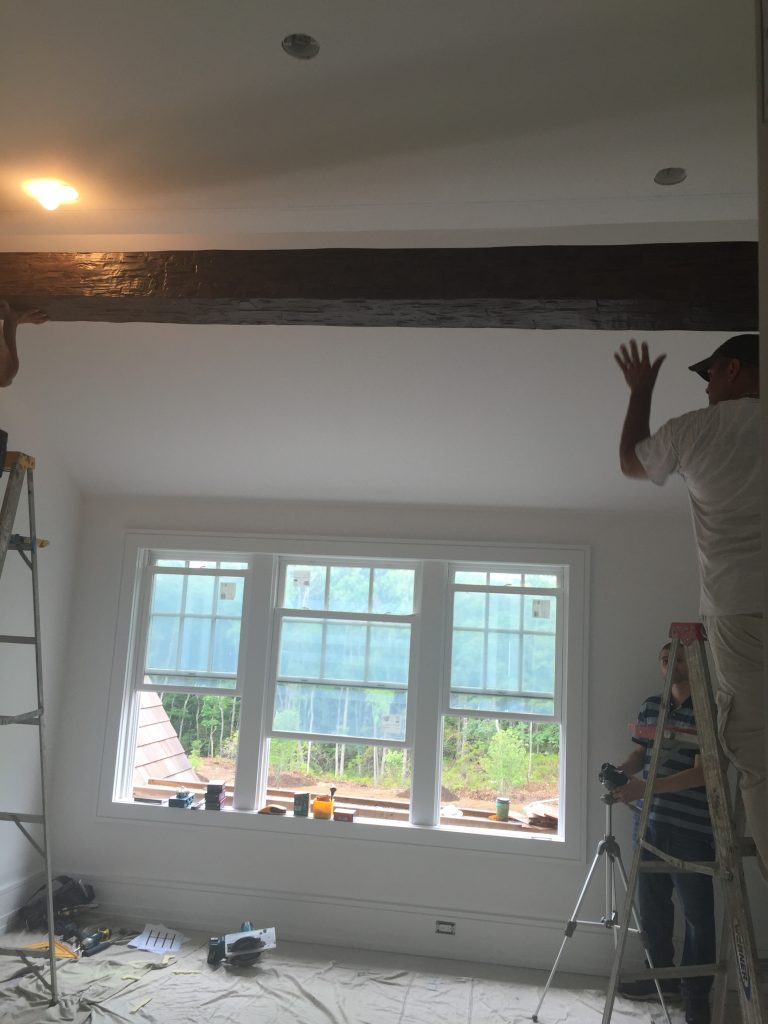 Installing the central beam
Once that decision had been made, the next step was the install the center beam. This was done by screwing wooden mounting blocks into the ceiling studs, and then slotting the hollow, u-shaped central beam over those blocks. Finally it was secured in place with regular screws, extending across the entire length of the room.
 The smaller beams were carefully cut and installed, fitting flush with the wall and central beam.
The next task was trickier. First the ceiling space was measured and some math employed to work out how to equally space the four smaller beams that would extend out of the central one.
The ends of the beams had to be cut at an angle, to fit flush with the wall and the central beam. While this was easy enough to do with a regular wood saw, it did take some preparation and measurement to ensure the smaller beams would fit flush with the larger, central one - giving the illusion of an interconnected, sturdy timber roof.
 Staining the beams
Once measured and cut, the process for installing the smaller beams was the same as the center beam. Mounting blocks were drilled into the ceiling studs through the drywall, then effortlessly slotting the smaller beams over them.
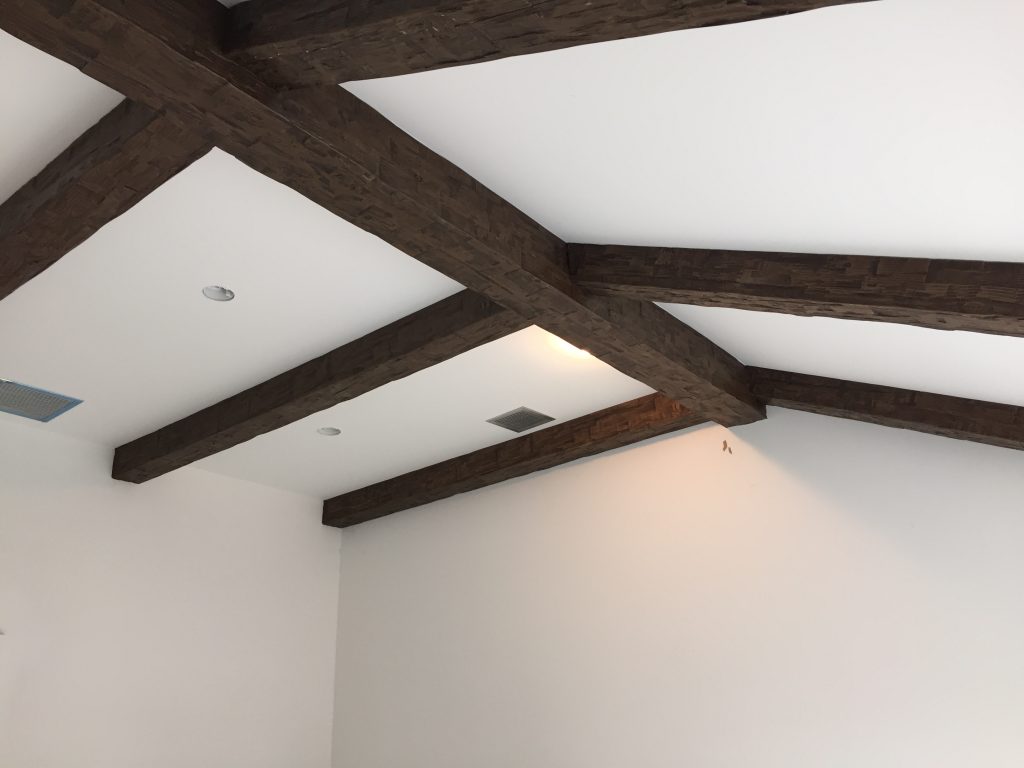 Finished
It's a very simple and straightforward process, that only requires a little thought and craftsmanship to deliver incredible-looking results. This ceiling project, for example, ended up look terrific. Not only that, but it totally fits into the style of the home and looks very authentic.
What do you make of the project? Let us know in the comments section below.
Shop Related Products


