
Period furniture gets a faux beamed ceiling to suit it, when an enterprising homeowner adds Timber Beams in Walnut to his living room.
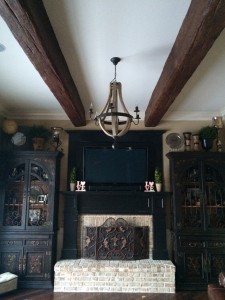
AFTER: Lee's room looks magnificent with the addition of two faux wood beams.
Faux-Beamed Ceiling Paired with Period Furniture
Lee Letourneau, from Missouri, collects beautiful furniture. Period, historic or just looking-the-part - each piece in his home has real character; and is steeped in the finest traditions of craftsmanship and artistry.
But while Lee's furniture might be historic, his home wasn't - which is why he turned to FauxWoodBeams.com to add a touch of age to his modern ceiling.
As you can see from the BEFORE picture Lee sent us, the ceiling in his Wildwood home was plain and standard white, with a single light fixture dangling from it.
While it was nice enough, it didn't really compliment the beautiful, hand-detailed tallboys standing at the ends of the room, or any of the other pieces of period or reproduction furniture Lee had collected.
His solution was elegant in its simplicity. After contacting FauxWoodbeams.com, he ordered two Timber Beams in classic Walnut. He then installed them lengthways across the ceiling of his room; to give the instant impression of exposed, supporting ceiling beams like you might find in a classic or historic home.
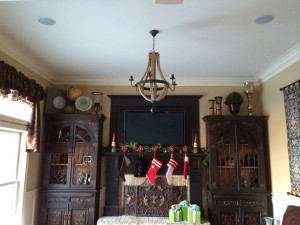
BEFORE: The ceiling was plain and uninteresting before.
The difference is, of course, that these beams are purely for decoration, rather than function. Once he'd installed them, though, it would be pretty impossible to tell the difference.
Installing the two beams was straightforward. Lee ordered our standard beams slightly longer than he needed, so he could cut them to size on site. This is always a smart idea, as it's simple to cut over-long beams to fit, but impossible to add to beams that come in a little on the short side.
Lee measured his ceiling twice, and then cut once - shearing off the over-sized ends of the beams he'd ordered with a regular wood saw.
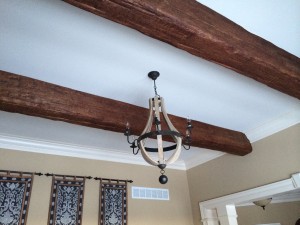
AFTER: A close-up of the beams reveals how vividly realistic they are.
Once the beams were cut to size, Lee attached mounting blocks to his ceiling with regular screws, which drilled straight into the studwork above. These mounting blocks are just pieces of wood, which the finished beam is then 'slotted over' for installation.
That's the part that requires two people. On a stepladder, Lee could easily lift the lightweight, polyurethene beams and position them over the mounting blocks; but it took an extra pair of hands to hold them steady while he drilled the beams into place with regular screws.
The beams are hollow inside, and the u-shaped channel is what slots over the mounting blocks. As a result, they sit flush with the ceiling and look vividly realistic; even though they can be secured quickly and easily with screws.
And the results speak for themselves. As you can see from the AFTER pictures, Lee's ceiling looks terrific; and the beams are a stunning addition which really bring the entire room - and it's historic and period furniture - together.
Shop Related Products


